
Are you looking for a way to give your axe head a unique and rustic look? Blackening an axe head is the perfect solution! Here’s how you can do it at home.

Adding a touch of vintage style to your tools can be a great way to both make them look cooler and maintain their rustic charm. The axe head is one tool that’s particularly easy to give an antique appeal. With its simple shape, all you need are some blackening compounds, general household items, and a few hours of work to make it look decades old!
In this blog post, we’ll cover how to blacken an axe head. From chemical coatings to DIY techniques like painting or scrubbing, we’ll show you exactly how it’s done so that your axe heads not only stand out from the crowd but also gain more distinctive character in the process!
What Will You Want?
Before getting started, you’ll need to gather some supplies. Here’s what you’ll want:
- A blackening compound (available at most hardware stores)
- A paintbrush
- Rags/old clothes for cleaning and buffing
- Sandpaper or steel wool for scrubbing (optional)
- Protective gloves and eyewear (for safety)
Once you have all your supplies, you can begin the process of how to blacken an axe head.
10 Easy Steps on How to Blacken an Axe Head
Step 1: Prep Your Axe Head
The first step is to thoroughly clean your axe head with a rag or an old cloth. This will help the blackening compound adhere to the metal properly. If there are any patches of rust on your axe head, use sandpaper or steel wool to remove them completely before proceeding. Wearing protective gloves and eyewear is recommended.
Step 2: Choose a Location
Choose an area with good ventilation to work in, as the blackening compound can give off unpleasant fumes. Additionally, it’s best to do this outdoors to avoid staining your walls or furniture. Because the blackening compound can be caustic, make sure to keep it away from any children or pets in the area.
Step 3: Apply the Blackening Compound
Once you’ve got everything prepped, apply the blackening compound evenly around the axe head using a paintbrush. Make sure that the head is completely covered, and let the compound sit for at least 30 minutes before wiping away any excess. You can use a cloth for this step.

Step 4: Wipe Away Excess
After letting the blackening compound sit on your axe head for 30 minutes, wipe away any excess with a rag or an old cloth. Be sure also to use steel wool or sandpaper if needed. Otherwise, the blackening compound may not penetrate the metal.
Step 5: Buff the Axe Head
Once all of the excess blackening compounds has been removed, it’s time to buff the axe head with a cloth until it reaches your desired level of luster. Be careful not to use too much force and always wear protective gloves to avoid any accidents. It is also recommended to use a mask when buffing.
Step 6: Let It Dry
Letting the axe head dry for at least 24 hours will help ensure that the blackening process is complete. This also gives the blackening compound enough time to cure and form a hard coating on the metal surface. Additionally, this will help protect it from rust and wear.
Step 7: Seal It Up
To protect your axe head from rusting, you’ll want to apply a clear sealant over the blackened area. This will help keep it looking good for a long time. Try to use a water-resistant sealant that is made specifically for metal surfaces.

Step 8: Test It Out
Now that your axe head is ready to use, you can test it out by chopping some wood or running it through a few drills. You should also inspect it regularly to make sure that the blackening compound is sticking and not flaking off. If it is, you can always apply another coat of blackening compound and repeat the process.
Step 9: Take Care of It
As with any tool, proper maintenance is key in keeping your axe head in top shape. Make sure to clean it often and oil the metal parts regularly to prevent rusting and wear and tear from regular use. You can use a cloth or a small brush to do this.
Step 10: Enjoy Your Axe Head!
At this point, your axe head should be looking better than ever! Take pride in your work and enjoy the unique look of your newly blackened axe head. Remember, proper care and maintenance will help keep it looking great for a long time.
By following these ten steps, you can easily blacken an axe head and give it more character in the process. So, don’t hesitate to give it a try and see how awesome your axe looks with a few hours of work!
5 Additional Tips and Tricks
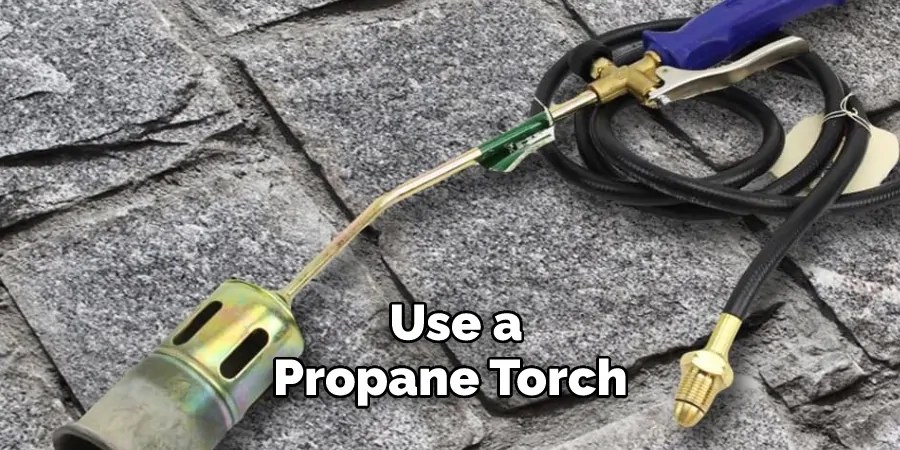
- Heat sets the color for a more permanent blackening. Use a propane torch or forge to heat up the axe head until it is just below red hot. Then, let it cool slowly in order to set the blackening.
- Consider adding a wax finish over the blackened axe head for extra weather resistance. This will help protect against rust and keep your axe looking good as new for longer!
- Sharpen the blade of your axe using a file or sharpening stone before blackening it. This will ensure that you get an even coating of black when you apply the solution and help make sure that no spots are missed during the process.
- If you opt to use oil-based blackening compounds, be sure to clean off any residue with mineral spirits afterward. This will help preserve the look and longevity of your axe head.
- Keep the blade away from moisture and humidity when storing your axe to prevent rusting. A coat of wax can also help protect against rust during long-term storage or if the axe is used outside in wet weather conditions.
By following these simple tips, you can easily blacken an axe head and make it look good as new for years to come!
5 Things You Should Avoid
- Avoid using acid or other corrosive materials to blacken your axe head. These can damage the metal and weaken the structure of your axe, which could, in turn, lead to breakage when you use it.
- Don’t use a heat source such as a torch or even an oven to blacken your axe head, as this can cause discoloration and possibly warp the metal.
- Never try to paint over rust spots on your axe head, as this can make them worse and eventually lead to more rusting down the line.
- Don’t apply too much pressure when sanding off any existing rust–you don’t want to damage the surface of your axe head!
- Finally, don’t forget to apply a protective layer of wax or oil after blackening your axe head. This will help keep it from rusting in the future and ensure that it maintains its aesthetic appeal.
Following these tips will help you blacken your axe head like a professional, so consider them when tackling this task!
What Oil Do You Use on an Axe Head?
When it comes to protecting an axe head after blackening, you should always opt for wax or oil. Popular choices include linseed oil, mineral oil, and beeswax. These oils will help protect the metal from moisture and prevent rust in the long run. Make sure to apply a generous layer of your chosen wax or oil and then wipe off any excess that is left behind. With the proper care, your axe will last you many years!
Additionally, how often should you re-apply this protective layer? The answer depends on how much wear and tear your axe has gone through since its last application–generally speaking, around once every few months is recommended depending on how heavily used it is. This way, you can be sure to keep your axe looking and performing its best!

By keeping these tips in mind when blackening your axe head, you’ll be able to ensure that it looks great for years to come. All it takes is a bit of basic maintenance and care, so make sure to take the time to do it right!
Conclusion
Having a blackened axe head is important for two reasons: both for aesthetics and maintenance. A blackened axe head is pleasing to the eye and helps dissuade rust from forming. By taking the time to blacken your axe head, you can greatly extend its lifespan. Not only does it look easier on the eyes, but you’ll also be thankful for all the effort once you notice how well your axe maintains its shape over time.
With this added independence, you can go forth and cut down whatever stump stands in your way. Whether it’s achieving a place in the wilderness or finishing that serious project lingering on your to-do list, we hope that our guide has helped you gain some insight on how to blacken an axe head.
Remember to use caution when making fire, sharpening tools, and handling dangerous equipment!
You Can Check It Out to Hang an Axe
Occupation: Expert in Hardware Tools
Education: Bachelor’s Degree in Mechanical Engineering
Profile:
Enrique Howard is a seasoned expert in the field of hardware tools, with a robust background in mechanical engineering that underpins his extensive knowledge and skills. Holding a degree in mechanical engineering, Enrique has cultivated a deep understanding of tool design, mechanics, and the intricacies of various hardware applications. His educational foundation empowers him to innovate and refine tools that enhance efficiency and effectiveness in a wide range of industries.
Professional Focus:
Enrique’s professional focus encompasses a diverse array of areas within the hardware tools sector, including:
- Tool Design and Development: Leveraging his engineering expertise, Enrique specializes in designing tools that meet specific user needs, ensuring optimal performance and durability.
- Material Science: Understanding the properties of various materials allows him to recommend the best tools for specific applications, enhancing safety and efficiency.
- Ergonomics: He emphasizes the importance of ergonomic design in tools, striving to create solutions that reduce user fatigue and improve comfort during prolonged use.
- Sustainability: Enrique is committed to promoting environmentally friendly practices in tool manufacturing, advocating for the use of sustainable materials and processes.
- Education and Training: Through workshops, seminars, and written content, he focuses on educating both professionals and DIY enthusiasts about tool selection, maintenance, and safe usage practices.
Throughout his career, Enrique has worked on numerous projects, collaborating with manufacturers and craftsmen to develop cutting-edge hardware solutions. His expertise spans from traditional hand tools to advanced power tools, allowing him to contribute significantly to both professional and DIY communities.
As an author, Enrique shares his insights through articles, guides, and tutorials, aimed at helping enthusiasts and professionals alike navigate the complexities of hardware tools. His passion for education and practical application drives him to continually explore new technologies and methodologies, making him a trusted voice in the hardware industry.
Whether he’s writing about the latest tool advancements or providing practical tips for tool maintenance, Enrique Howard is dedicated to empowering others with the knowledge and skills necessary to excel in their hardware endeavors.