
Are you looking for an easier, more precise way to level and grade your land? You’ve come to the right place! With a laser level, you can enjoy simplified and accurate leveling and grading that’s sure to save you time and money. In this blog post, we’ll be covering everything from how laser levels work all the way up to what tools are available on the market today. So if you’re ready to take your levelling game up a notch, let’s get started!

In this article, we’ll uncover how to use a laser level for grading. By understanding how these tools work and differentiating between different types of lasers on the market right now, you’ll have confidence that your finished product is exactly how you envisioned it!
Why May You Want to Use a Laser Level for Grading?
1 . To Achieve Accuracy in Your Work
Using a laser level for grading ensures accuracy and precision in your work. The laser beam provides a consistent and even reference point, allowing you to finish the job quickly with minimal errors. It is also much easier to use than trying to line up posts or stakes by hand.
2 . To Save Time
By using a laser level for grading, you can save time and get the job done more efficiently. Because it is relatively easy to use, you don’t have to worry about spending extra time getting everything lined up correctly; instead, you can simply adjust the height of the beam and move on to the next step quickly.
3 . To Level Out Uneven Ground
Working on uneven ground can be difficult and time-consuming, but with a laser level for grading, you can easily level out the area. The laser beam will provide a clear indication of where the ground is higher or lower than it should be so you know exactly how to adjust your work accordingly.

4 . To Measure Distances Accurately
A laser level can also be used to measure distances accurately so you know exactly how much material to use for any given project. This is especially useful for large-scale projects where getting the measurements right is essential. With a laser level, you won’t have to worry about guessing or making mistakes; instead, you can get the job done quickly and with confidence.
5 . To Attain Professional-Level Results
With a laser level, you can attain professional-level results easily and quickly. This is because the laser beam provides an even reference point that allows you to make precise adjustments for any given task. You won’t have to worry about uneven or sloppy results; instead, you can complete the job with confidence and precision.
6 . To Save Money
Using a laser level for grading can also save you money in the long run. By reducing the amount of time it takes to complete jobs, you don’t have to worry about paying extra labor costs or buying more materials than necessary. Furthermore, since you are getting professional-level results, you won’t have to worry about paying for costly repairs or replacements due to sloppy workmanship.
Using a laser level for grading can make any job easier and more efficient. Whether you are working on uneven ground or trying to measure distances accurately, the laser beam provides a consistent and even reference point that allows you to get the job done quickly and with confidence. With a laser level, you can achieve professional-level results while also saving time and money in the long run.
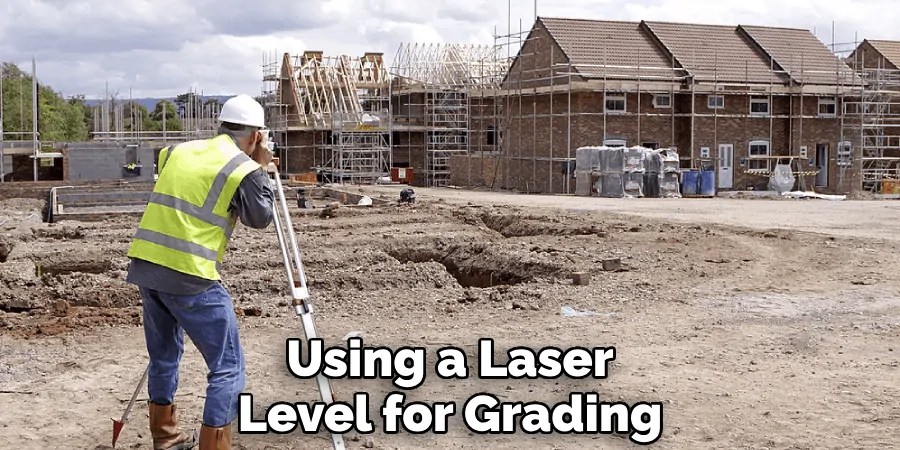
How to Use a Laser Level for Grading in 6 Easy Steps
Step 1: Gather All The Tools
The very first step is to make sure you have all the necessary tools at hand. You will need a laser level, a tripod for mounting the unit, and a grade rod with measurements marked on it. Make sure to also have enough extra batteries in case your laser level runs out of power while in use.
Step 2: Set Up Tripod and Laser Level
Once you have all the necessary tools, it is time to set up your tripod and laser level. Make sure that the tripod is stable and secure before mounting the unit onto it. Once you have mounted the laser level, use a bubble level on each leg of the tripod to ensure that everything is even and there are no wobbles.
Step 3: Adjust the Height of the Laser Beam
Once the laser level is secure, you can adjust the height of the beam to your desired setting. Make sure to use a grade rod or other measuring device so that you can get an accurate reading.

Step 4: Mark Grade Points on the Ground
Now that the laser beam is set up and ready to go, it’s time to mark grade points on the ground. Using the laser beam as a reference point, you can easily see when the ground is higher or lower than it should be. You can then mark these areas accordingly so that you know exactly where to make adjustments later on.
Step 5: Make Adjustments as Necessary
Once all of your grade points have been marked, it is time to make any necessary adjustments. You may need to level out the ground or add more material in certain areas. It is important to use your grade rod as a reference point when making these adjustments so that you can ensure accuracy and precision.
Step 6: Double Check Your Work
Once you have made all of the necessary adjustments, it’s time to double-check your work. This is important to make sure that everything is even and there are no further changes needed. Once you have verified that your grading job is complete, you can go ahead and clean up the area before moving on to the next task.
Using a laser level for grading can be a great way to ensure accuracy and precision in your work. With a few simple steps, you can easily get the job done quickly and with confidence. Just remember to double-check your work before moving on to the next step so that everything is even and there are no further adjustments needed. Happy grading!

Some Extra Tips to Use a Laser Level for Grading
1 . Do Not Rush
It is important to take your time when using a laser level for grading. Rushing through the process can lead to mistakes and sloppy results, so make sure that you are taking your time and double-checking everything before moving on.
2 . Use Extra Batteries
Having extra batteries on hand is always a good idea, just in case your laser level runs out of power while in use. This will save you the hassle of having to stop and replace the batteries, allowing you to get the job done quickly and efficiently.
3 . Replace Damaged Parts Immediately
If any parts of your laser level are damaged or broken, it is important to replace them immediately. Faulty parts can lead to inaccurate readings and sloppy results, so make sure that you are replacing damaged parts swiftly.
4 . Be Careful When Moving the Laser Level
It is important to be extra careful when moving or transporting your laser level; sudden impacts or drops can damage the unit and lead to inaccurate readings. Make sure to use a case or padded bag when transporting your laser level to ensure that it stays safe and secure.
5. Consider Investing in a Grade Rod
A grade rod is a helpful tool for any grading job. It makes it a lot easier to keep track of measurements and make precise adjustments when needed. Investing in a good quality grade rod can be an invaluable asset for any laser-level user.
6 . Use the Bubble Level on The Tripod
Before setting up your laser level, it is important to make sure that the tripod is secure and even. You can use a bubble level on each leg of the tripod to ensure that there are no wobbles or unevenness. This is critical for getting accurate readings from your laser level.
7 . Use The Laser Level as A Reference Point
Using the laser beam as a reference point can help you get the job done quickly and accurately. By marking grade points along the beam, you can easily see which areas of the ground are higher or lower than they should be, making it easier to make adjustments accordingly.

By following these easy steps, you will have no problem getting professional-level results using a laser level for grading. With just a bit of practice and patience, you can get any job done quickly and with confidence! Happy grading!
Frequently Asked Questions
What Precautions Should I Take When Using a Laser Level?
When using a laser level, it is important to take the proper safety precautions. Make sure you wear eye protection and stay away from reflective surfaces that can bounce the beam back into your eyes. Additionally, be sure to read the instruction manual carefully before operating the device. Additionally, never look directly at the beam of light as this can cause permanent damage to your eyes. Always handle the device with care and keep it away from children. It is also important to frequently check the batteries and replace them when necessary.
Is There Any Maintenance Necessary for a Laser Level?
Yes, there is some maintenance required for a laser level in order to ensure its accuracy. You should always keep the device in a safe and dry place away from direct sunlight. Additionally, you should clean the lens regularly with a soft cloth to make sure that it is free of dust and dirt particles which can interfere with accuracy. Occasionally, you should also check if the laser level is still calibrated correctly and adjust it accordingly if necessary. Finally, inspect all cables and connectors for any signs of damage and replace them if necessary.
What Is the Difference Between a Rotary Laser Level and a Line Laser?
The primary difference between a rotary laser level and a line laser is in how they project their beams. While a line laser projects its beam in a straight line, a rotary laser produces circular rotation patterns with its beam to measure distances both horizontally and vertically. Rotary laser levels are commonly used for grading, while line lasers are more suitable for smaller projects such as installing furniture or tiling floors. Additionally, rotary laser levels tend to be more expensive than line lasers due to their increased accuracy and versatility.
What Are the Benefits of Using a Laser Level?
Using a laser level has many advantages. Firstly, it can provide you with an accurate and consistent measurement of distances both horizontally and vertically, allowing for precise leveling and grading. Additionally, it is much faster than using manual measuring tools such as a tape measure or level and beam compass. Finally, most laser levels are lightweight and easy to use, making them the ideal tool for all kinds of projects around the house or at work.
What Are Some Tips for Using a Laser Level?
When using a laser level, there are some steps you can take to ensure accurate and consistent results. Firstly, make sure that your device is set up properly before measuring. Additionally, use a tripod to keep the laser level stable when measuring long distances and ensure that it is placed on a level surface. Finally, use the laser to establish points and then measure between them with a tape measure for greater accuracy. With these tips in mind, you will be sure to get perfect results every time!

Conclusion
In conclusion, laser levels are incredibly useful tools for grading and constructing. Without significant time investment in learning how to use one properly, they can improve your project quality immensely. With the proper training, however, their appeal increases even more, allowing for further precision and accuracy that’s simply impossible with manual measurements.
Now you know how to use a laser level for grading! And while there are some risks involved in using them improperly, following safety guidelines eliminate this worry completely. Whether you are an amateur or a professional looking to increase the quality of your work, laser level is a great tool to consider getting – it will decrease the amount of time you have to spend perfecting deliveries and allow you to focus on creating high-quality results.
Occupation: Expert in Hardware Tools
Education: Bachelor’s Degree in Mechanical Engineering
Profile:
Enrique Howard is a seasoned expert in the field of hardware tools, with a robust background in mechanical engineering that underpins his extensive knowledge and skills. Holding a degree in mechanical engineering, Enrique has cultivated a deep understanding of tool design, mechanics, and the intricacies of various hardware applications. His educational foundation empowers him to innovate and refine tools that enhance efficiency and effectiveness in a wide range of industries.
Professional Focus:
Enrique’s professional focus encompasses a diverse array of areas within the hardware tools sector, including:
- Tool Design and Development: Leveraging his engineering expertise, Enrique specializes in designing tools that meet specific user needs, ensuring optimal performance and durability.
- Material Science: Understanding the properties of various materials allows him to recommend the best tools for specific applications, enhancing safety and efficiency.
- Ergonomics: He emphasizes the importance of ergonomic design in tools, striving to create solutions that reduce user fatigue and improve comfort during prolonged use.
- Sustainability: Enrique is committed to promoting environmentally friendly practices in tool manufacturing, advocating for the use of sustainable materials and processes.
- Education and Training: Through workshops, seminars, and written content, he focuses on educating both professionals and DIY enthusiasts about tool selection, maintenance, and safe usage practices.
Throughout his career, Enrique has worked on numerous projects, collaborating with manufacturers and craftsmen to develop cutting-edge hardware solutions. His expertise spans from traditional hand tools to advanced power tools, allowing him to contribute significantly to both professional and DIY communities.
As an author, Enrique shares his insights through articles, guides, and tutorials, aimed at helping enthusiasts and professionals alike navigate the complexities of hardware tools. His passion for education and practical application drives him to continually explore new technologies and methodologies, making him a trusted voice in the hardware industry.
Whether he’s writing about the latest tool advancements or providing practical tips for tool maintenance, Enrique Howard is dedicated to empowering others with the knowledge and skills necessary to excel in their hardware endeavors.