
Do you want to learn the basics of die sets? Die sets are essential for crafting and creating unique projects out of paper and other materials.

Dies can easily cut, emboss, deboss, score, and stencil all kinds of shapes into lightweight material. Whether you’re just starting out with DIY crafting or have years of experience, using die sets will surely add some creativity and individuality to whatever project you decide to tackle!
With a bit of practice, you’ll be able to produce results that will make your project look professional. If you’re feeling overwhelmed with the vast range of die sets available in stores today – don’t worry! We have compiled this easy guide on how to use a die set so that anyone can easily create beautiful finished products!
What Will You Need?
Before you begin, make sure to have the following items handy:
- A die set of your choice
- Cutting material (paper, cardstock, felt, or fabric)
- Clear stamps and ink pad for additional decorative effects
Once you have all your items ready, it’s time to get started crafting!
10 Easy Steps on How to Use a Die Set
Step 1: Choose Your Template
Select the template of your desired shape from the die set. There are a variety of shapes and sizes available, so choose something that suits your project! It depends on the material you’re cutting.

Step 2: Place Your Template
Position your template onto the cutting material, making sure that it is securely placed. If you are working with fabric, use temporary adhesive to hold the template in place. Don’t forget to leave some room around the edges of your template, as this will make it easier to cut.
Step 3: Place Your Materials in the Die Set
Place your cutting material (paper, cardstock, or fabric) and template into the die set. Ensure that both materials’ edges line up perfectly within the die set. If you are using fabric, using a cutting plate or a sheet of cardstock underneath the material is important.
Step 4: Secure Your Materials
Secure your material in the die set by closing the lock tabs. This is to ensure that it does not move when you are cutting. Try to lightly press down on the material to make sure that it is properly locked in place.
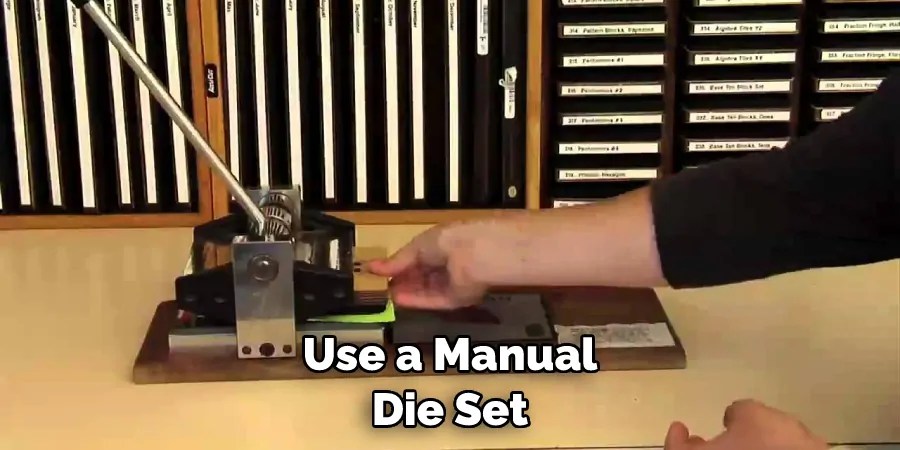
Step 5: Cut Your Materials
You can use a manual die set by pressing the handle down with your hand or an electronic die set by turning it on and letting it work for you. If you are using an electronic die set, place it on a flat. Additionally, be careful not to push too hard on the material, or you might damage the die set.
Step 6: Open Up The Die Set
Once the materials have been cut through, carefully open up the die set to remove your material. Make sure that all edges of your paper are cleanly cut before continuing to the next step! If you are using fabric,
to remove the cut pieces carefully.
Step 7: Remove the Template
Carefully remove the template from your pieces of material. It should come off easily if everything is cut properly. Another helpful tip is to use a small brush or sponge to help remove the template from delicate materials such as fabric.
Step 8: Embellish
You can add sparkle or decorative details to your project using clear stamps or ink pads. This will give your project a more professional look! Moreover, you can also use glitter or colorful markers to add an extra element of fun.
Step 9: Assemble Your Pieces
Depending on your project type, you may need to assemble pieces together before gluing. Take care when doing this step so all the pieces fit perfectly! Ensure that all pieces are securely held together before gluing.
Step 10: Glue It All Together
Once you’re happy with the results, use some glue to secure everything in place and let it dry for a few minutes. You’ve now created something beautiful with a die set – congratulations! Always remember to clean up the die set after use.

By following these steps, you’re sure to have a great time crafting with your die set and create something unique for yourself or someone special. Let us know if this guide helped you in any way – we’d love to hear from you!
5 Additional Tips and Tricks
1. Always use a lubricant to ensure that you get an even cut. This will also make it easier for you to remove the die from the die set after cutting.
2. Never too much pressure when cutting with a die set; otherwise, you could cause or break the tool.
3. Have extra dies handy so if one is worn out or breaks, you have a replacement instead of buying another one.
4. Never force the material through the die – this can create cracks and other flaws in the end product or cause damage to the die itself and shorten its lifespan.
5. If possible, take time to test different materials before purchasing your die set, as some materials may require specific die sets to achieve the desired results.
By following these guidelines, you can be sure that your die set is used safely and effectively. With practice, you’ll become a pro in no time!
5 Things You Should Avoid
1. Avoid using a die set for tasks it was not designed for; this can cause damage to the die, tool, and material.
2. Never use a blunt or damaged die – always make sure that your dies are sharp and in good condition before each use.
3. Don’t forget to use protective gear when working with a die set – safety glasses and gloves should be worn at all times while operating one of these tools.
4. Avoid skimping on lubricant; if you don’t apply enough, you may create an uneven cut or damage the material being cut.
5. When storing your die set, never store it in a location where it could get wet or rust; this will reduce its lifespan and lead to inferior performance.
Following these simple guidelines ensures that your die set is used safely and effectively every time. With a little practice, you’ll be a pro in no time!
How Do You Use a Die on a Bolt?
1. Place the bolt into the die set and make sure it is firmly in place.

2. Apply a generous amount of lubricant to the surface of the bolt, then start tightening the die with a wrench.
3. Once you have tightened it enough, begin turning the wrench until you feel resistance; this indicates that the die has cut into the bolt and is ready to be used.
4. Continue turning until all threads are cut into the bolt, then remove it from the tool and inspect for an even cut and proper threading.
5. Finally, use a brush or rag to clean off any excess lubricant from both sides of the bolt before using it as desired.
By following these steps, you can be sure that your bolt is properly threaded and ready for use. With a little practice, you’ll become a pro in no time!
If you ever find yourself needing to cut threads into a bolt but don’t have the right die set, consider using an adjustable die set. These sets are designed to accommodate multiple bolt sizes and can be used to cut threads into any common thread size. With adjustable die sets, you only need to adjust the die, secure the bolt, and turn the wrench to achieve the desired threading.
With these tips in mind, you should have no trouble using a die set to create threads in any bolt. With a little practice, you’ll become a pro in no time!
Conclusion
With a die set, your possibilities for achieving different projects and creating unique products are endless. Whether your hand die cutting, embossing intricate designs, or rolling out paper clay for dollhouse creations, the advantages of having your own die sets are abundant.
If you’re just starting out with this technique, it can be overwhelming at first – all of the different shapes and sizes of dies, what materials to use, and how to work around tricky areas when cutting. But practice makes perfect, and with a few tips and the right supplies, you’ll be a master of die setting in no time.
And once you start creating beautiful works with precise elements and intricate details made from dies that are better than anything on the market, you will understand why people worldwide use this amazing method every day!
Hopefully, the article on how to use a die set has provided you with the knowledge and tools necessary to get started. With a little practice, you’ll be able to create unique and beautiful products in no time. Good luck exploring your die set! Now that you know how to use it properly and safely, you should have no trouble creating amazing works of art with perfect details and precision.
You May Check It Out To Tighten a Knife Blade
Occupation: Expert in Hardware Tools
Education: Bachelor’s Degree in Mechanical Engineering
Profile:
Enrique Howard is a seasoned expert in the field of hardware tools, with a robust background in mechanical engineering that underpins his extensive knowledge and skills. Holding a degree in mechanical engineering, Enrique has cultivated a deep understanding of tool design, mechanics, and the intricacies of various hardware applications. His educational foundation empowers him to innovate and refine tools that enhance efficiency and effectiveness in a wide range of industries.
Professional Focus:
Enrique’s professional focus encompasses a diverse array of areas within the hardware tools sector, including:
- Tool Design and Development: Leveraging his engineering expertise, Enrique specializes in designing tools that meet specific user needs, ensuring optimal performance and durability.
- Material Science: Understanding the properties of various materials allows him to recommend the best tools for specific applications, enhancing safety and efficiency.
- Ergonomics: He emphasizes the importance of ergonomic design in tools, striving to create solutions that reduce user fatigue and improve comfort during prolonged use.
- Sustainability: Enrique is committed to promoting environmentally friendly practices in tool manufacturing, advocating for the use of sustainable materials and processes.
- Education and Training: Through workshops, seminars, and written content, he focuses on educating both professionals and DIY enthusiasts about tool selection, maintenance, and safe usage practices.
Throughout his career, Enrique has worked on numerous projects, collaborating with manufacturers and craftsmen to develop cutting-edge hardware solutions. His expertise spans from traditional hand tools to advanced power tools, allowing him to contribute significantly to both professional and DIY communities.
As an author, Enrique shares his insights through articles, guides, and tutorials, aimed at helping enthusiasts and professionals alike navigate the complexities of hardware tools. His passion for education and practical application drives him to continually explore new technologies and methodologies, making him a trusted voice in the hardware industry.
Whether he’s writing about the latest tool advancements or providing practical tips for tool maintenance, Enrique Howard is dedicated to empowering others with the knowledge and skills necessary to excel in their hardware endeavors.