
Testing RCA outputs with a multimeter is a practical skill for diagnosing audio issues and ensuring proper signal transmission in your audio system. RCA connectors, commonly used in consumer electronics, allow for transferring audio and video signals between devices.
By using a multimeter, you can check for continuity, measure resistance, and verify the voltage output of these connectors. Whether you’re troubleshooting a malfunctioning stereo system, setting up new equipment, or ensuring cable integrity, knowing how to use a multimeter to test RCA outputs effectively can save time and help maintain optimal audio performance.
In this guide on how to test RCA outputs with multimeter, we’ll cover the essential steps and techniques to accurately test RCA outputs, ensuring your audio system functions smoothly and efficiently.
What Will You Need?
Before we dive into the steps of testing RCA outputs with a multimeter, let’s first take a look at the materials and tools you’ll need for this task:
- A multimeter (preferably one with both continuity and voltage measuring functions)
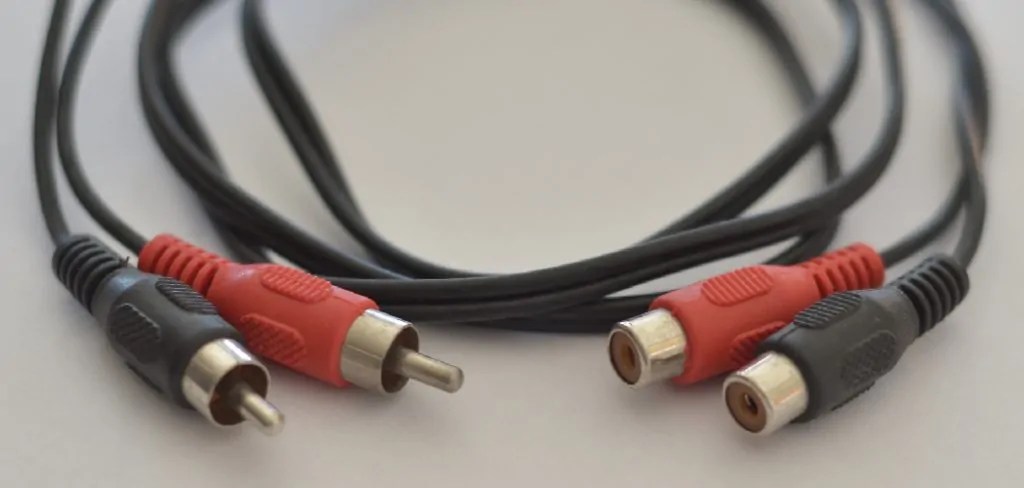
- RCA connectors (cables or adapters)
- Audio source (such as a stereo or CD player)
- A set of speakers
- User manual or technical specifications for your audio equipment (for reference)
Once you have all the necessary materials, you can begin testing your RCA outputs.
10 Easy Steps on How to Test RCA Outputs With Multimeter
Step 1: Set Up the Multimeter

To effectively test RCA outputs with your multimeter, the initial step involves configuring the multimeter to the appropriate settings. Start by turning on the multimeter and setting it to measure continuity or resistance, often denoted by the Ω symbol. This setting will allow you to check the integrity of the cables by ensuring there are no breaks or faults. If your multimeter has a dedicated continuity setting, which may include a speaker symbol, this can be especially useful as it emits a sound if continuity is present.
Ensure the probes are correctly connected to the multimeter ports, typically with the black probe plugged into the “COM” port and the red probe into the red port, labeled “VΩ” or similar, to facilitate accurate measurements. Confirm that the multimeter is in good working condition by testing it on a known circuit or using a test resistor to ensure its accuracy before testing the RCA outputs.
Step 2: Identify the RCA Connectors
Once your multimeter is set up, the next step is identifying the RCA connectors you intend to test. RCA connectors usually have distinctive colors, such as red for the right channel and white or black for the left channel. These color codes make it easier to ensure you are testing the correct outputs corresponding to different audio channels. Carefully inspect the connectors and cables for any visible signs of damage, such as frayed wires or bent pins, which could affect your testing accuracy. By identifying the connectors and ensuring they are in proper physical condition, you can confidently proceed to the next step.
Step 3: Connect the Multimeter to the RCA Connectors
With the RCA connectors identified and your multimeter set up, it’s time to connect the multimeter probes to the RCA connectors physically. Begin by gently inserting the black probe, connected to the multimeter’s “COM” port, into the outer ring of the RCA connector. This outer portion is typically the ground or shield connection.
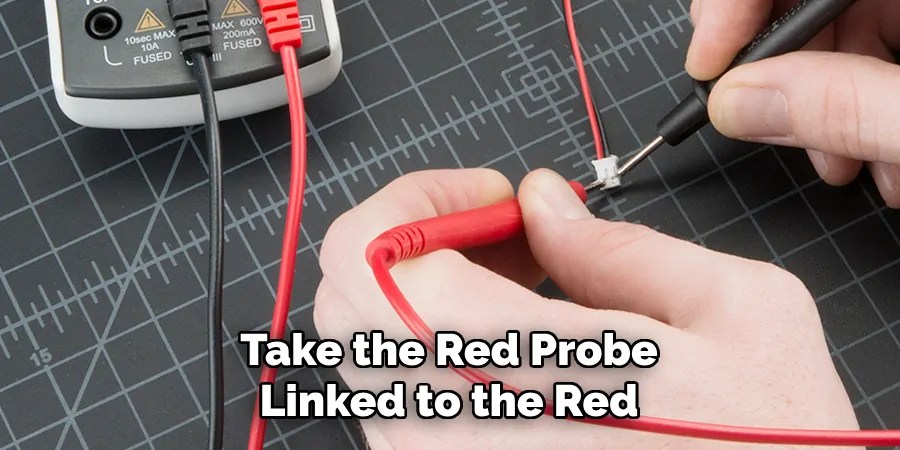
Next, take the red probe linked to the red “VΩ” port and contact the RCA connector’s center pin. The center pin is the signal conductor and is crucial for your measurement. Ensure a firm and stable connection between the probes and the RCA connectors to prevent any inaccuracies in your readings. This connection will allow the multimeter to test for continuity and resistance, which are vital for verifying the electrical integrity of the RCA cables and ensuring they can effectively carry audio signals.
Step 4: Test for Continuity
The next step is to test for continuity after correctly connecting the multimeter to the RCA connectors. Turn on the multimeter and ensure it is set to the continuity mode if it has one, or use the resistance setting. The objective is to verify that there are no interruptions in the electrical pathway of the RCA cables.
Listen for a beep from the multimeter, indicating continuity and the wires are intact with no breaks. If there’s no audible signal or the resistance reading shows an unusually high value, it might suggest a break in the cable or a poor connection. Carefully inspect the wires and test again to confirm the result before moving forward. Ensuring continuity is crucial for reliable audio signal transmission in your system.
Step 5: Measure Resistance

Once continuity has been verified, the next step is to measure the resistance of the RCA cables. Resistance can provide additional information regarding the quality and condition of the wires. Set your multimeter to the resistance measuring mode, indicated by the Ω symbol.
Keep the multimeter probes connected to the same points on the RCA connectors: the black probe on the outer ring and the red probe on the center pin. A low resistance reading, typically just a few ohms, indicates a good connection and that the cable is in good condition. If the resistance is exceptionally high, it suggests a potential issue, such as corrosion or internal damage within the cable. Document your findings, and if any cables exhibit high resistance, consider replacing them to maintain optimal audio performance.
Step 6: Check for Voltage
In this step, you will check for voltage on the RCA outputs to ensure they are functioning properly. Start by setting your multimeter to the voltage measurement mode, often indicated by a “V” symbol. The audio source, such as a stereo or CD player, should be powered on and connected to the RCA outputs you’re testing. Carefully connect the multimeter probes as before, with the black probe touching the outer ring and the red probe attached to the center pin of the RCA connector. Observe the voltage reading on the multimeter display.
A typical healthy RCA output will display a small voltage reading as it carries low-level audio signals. If there is no voltage or an unusually high reading, it may indicate a malfunction within the audio source or issues with the RCA outputs. Take note of any abnormalities and consult the audio equipment’s user manual if necessary to determine expected voltage levels.
Step 7: Inspect the RCA Cable and Connectors
After completing electrical testing of the RCA outputs, visually inspect the RCA cables and connectors for any physical damage. Look for signs of wear like cracks, discoloration, corrosion on the connectors, and any frays in the cable insulation. Physical damage can affect signal quality and lead to issues such as static interference or signal loss. If any defects are found, consider repairing or replacing the affected cables to maintain the integrity of the audio system. This step ensures that electrical functionality and physical condition are optimal for the best possible audio performance.
Step 8: Conduct a Signal Test

To further verify the RCA outputs and ensure they provide high-quality audio signals, conduct a signal test using an audio source and a speaker or amplifier. Connect the RCA outputs to a compatible input on your speaker or amplifier. Play an audio track through the source device, ensuring all connections are secure. Listen carefully for any distortion, channel imbalance, or audio output interruptions. Use different audio tracks, if possible, such as varying frequencies or music genres, to comprehensively assess the output quality. If any issues are noted, troubleshoot by re-checking the RCA connectors, cables, and audio source settings. Combined with previous electrical tests, this practical test ensures your audio system functions as intended, delivering clear and consistent sound performance.
Step 9: Finalize System Testing
Once the signal test is completed and any necessary adjustments are made, finalize the testing process by ensuring the entire audio system is functioning normally. Double-check all connections to confirm that they are secure and properly aligned. Power up all components in the system, starting from the audio source and moving through any amplifiers to the output devices like speakers or headphones. Conduct a brief listening session at different volume levels to verify that the sound is consistent across the system without unwanted noise or distortion. Adjust any system settings as needed to optimize sound quality and balance.
Step 10: Maintenance Tips
Regular maintenance is essential to ensure the longevity and optimal performance of your audio system. Start by keeping the RCA cables and connectors clean; periodically wiping them with a soft, dry cloth can prevent dust accumulation and corrosion. Additionally, avoid bending or twisting the wires, leading to internal damage. Store the cables neatly to prevent tangling, and if not in use, cover exposed connectors with protective caps. Inspect the wires and connectors regularly for any signs of wear or damage, and address any issues promptly to avoid signal disruption.
By following these maintenance tips and conducting routine testing of your RCA outputs, you can ensure the longevity and consistent, high-quality performance of your audio system.
Conclusion
In conclusion, how to test RCA outputs with multimeter is a straightforward process that can significantly enhance the reliability and performance of your audio system.
You can identify and resolve potential issues such as poor connections, damaged cables, or malfunctioning audio sources by following the outlined steps—from testing for continuity and measuring resistance to checking for voltage and conducting a signal test. Regular visual inspections and maintenance are equally important, as they help prevent signal interference and extend the lifespan of your audio components.
By ensuring both electrical functionality and physical integrity, you can enjoy clear, high-quality audio performance and avoid unexpected disruptions. Consistently apply these practices to maintain an optimal listening experience.
Occupation: Expert in Hardware Tools
Education: Bachelor’s Degree in Mechanical Engineering
Profile:
Enrique Howard is a seasoned expert in the field of hardware tools, with a robust background in mechanical engineering that underpins his extensive knowledge and skills. Holding a degree in mechanical engineering, Enrique has cultivated a deep understanding of tool design, mechanics, and the intricacies of various hardware applications. His educational foundation empowers him to innovate and refine tools that enhance efficiency and effectiveness in a wide range of industries.
Professional Focus:
Enrique’s professional focus encompasses a diverse array of areas within the hardware tools sector, including:
- Tool Design and Development: Leveraging his engineering expertise, Enrique specializes in designing tools that meet specific user needs, ensuring optimal performance and durability.
- Material Science: Understanding the properties of various materials allows him to recommend the best tools for specific applications, enhancing safety and efficiency.
- Ergonomics: He emphasizes the importance of ergonomic design in tools, striving to create solutions that reduce user fatigue and improve comfort during prolonged use.
- Sustainability: Enrique is committed to promoting environmentally friendly practices in tool manufacturing, advocating for the use of sustainable materials and processes.
- Education and Training: Through workshops, seminars, and written content, he focuses on educating both professionals and DIY enthusiasts about tool selection, maintenance, and safe usage practices.
Throughout his career, Enrique has worked on numerous projects, collaborating with manufacturers and craftsmen to develop cutting-edge hardware solutions. His expertise spans from traditional hand tools to advanced power tools, allowing him to contribute significantly to both professional and DIY communities.
As an author, Enrique shares his insights through articles, guides, and tutorials, aimed at helping enthusiasts and professionals alike navigate the complexities of hardware tools. His passion for education and practical application drives him to continually explore new technologies and methodologies, making him a trusted voice in the hardware industry.
Whether he’s writing about the latest tool advancements or providing practical tips for tool maintenance, Enrique Howard is dedicated to empowering others with the knowledge and skills necessary to excel in their hardware endeavors.