
Are you having problems starting your vehicle? Does the engine not ignite correctly? It could be an issue with your ignition module.

When diagnosing ignition issues in a vehicle, one of the essential components to test is the ignition module. This small yet crucial part plays a vital role in controlling the ignition coil and ensuring proper spark timing to ignite the fuel-air mixture in the engine cylinders. A malfunctioning ignition module can lead to misfiring, poor performance, or even complete engine failure. However, with a multimeter—a versatile tool for measuring electrical properties—you can effectively test the ignition module to determine if it functions correctly.
This guide will walk you through the necessary steps on how to test ignition module with multimeter, helping you ensure your engine runs smoothly and reliably.
What Will You Need?
To test the ignition module, you will need the following tools and materials:
- A multimeter with voltage and resistance measurement capabilities
- Safety gloves and goggles
- The vehicle’s service manual or wiring diagram (for reference)
- A helper (optional but recommended)
Once you have gathered all the necessary items, you can begin the testing process.
10 Easy Steps on How to Test Ignition Module With Multimeter
Step 1: Prepare for Safety

Before embarking on the testing process, it’s crucial to prioritize safety to prevent any accidents or injuries. Begin by turning off the engine and ensuring that the ignition key is removed from the ignition switch, as this will avoid any unexpected starts during your diagnosis. Additionally, disconnect the negative terminal of the vehicle’s battery to cut off the electrical supply and mitigate any electrical hazards.
It is advisable to wear safety gloves and goggles to protect your hands and eyes from any potential harm that could arise from working with electrical components. Ensure you have enough lighting in the area where you will be working to see all components and connections. A clean and organized workspace, free from clutter, will also help reduce the risk of accidents.
Step 2: Locate the Ignition Module
To proceed with the testing, you must first locate the ignition module in your vehicle. The specific location of the ignition module can vary depending on the make and model of your car. Generally, it can be found in the engine compartment, often mounted near the distributor or on the engine block itself. Consult your vehicle’s service manual to identify the ignition module and understand its connections accurately. Once located, visually inspect the ignition module for any signs of damage, such as corrosion, cracks, or burnt areas. Ensure that all electrical connectors and wiring associated with the module are secure and in good condition. Any issues identified during this visual inspection should be addressed before proceeding with the testing.
Step 3: Set Your Multimeter

With the ignition module located, it’s time to prepare your multimeter for accurate testing. Begin by setting your multimeter to measure resistance (ohms). This setting is generally represented by the Ohm symbol (Ω) on the multimeter. If your multimeter has multiple range settings for resistance, choose the lowest one above 0 ohms to ensure precision in your measurements. Before testing, it’s a good practice to check the multimeter’s functionality by touching the two probes together; the reading should indicate zero or very close to zero ohms, confirming that it’s operating correctly.
Step 4: Test the Resistance of the Ignition Module
Now that your multimeter is set, you can start testing the resistance of the ignition module to evaluate its condition. First, refer to your vehicle’s service manual or wiring diagram to locate the specific terminals on the ignition module you need to test. Usually, these checkpoints are marked or labeled in the manual. Carefully place one probe of the multimeter on each designated terminal of the ignition module. Ensure the probes make solid contact with the terminals for an accurate reading. Observe the resistance value displayed on the multimeter. Compare this reading to the manufacturer’s specifications outlined in the service manual.
If the resistance value falls outside the recommended range, this may indicate a faulty ignition module that requires repair or replacement. If the values are within the specified range, the module is likely functioning correctly.
Step 5: Test the Voltage of the Ignition Module
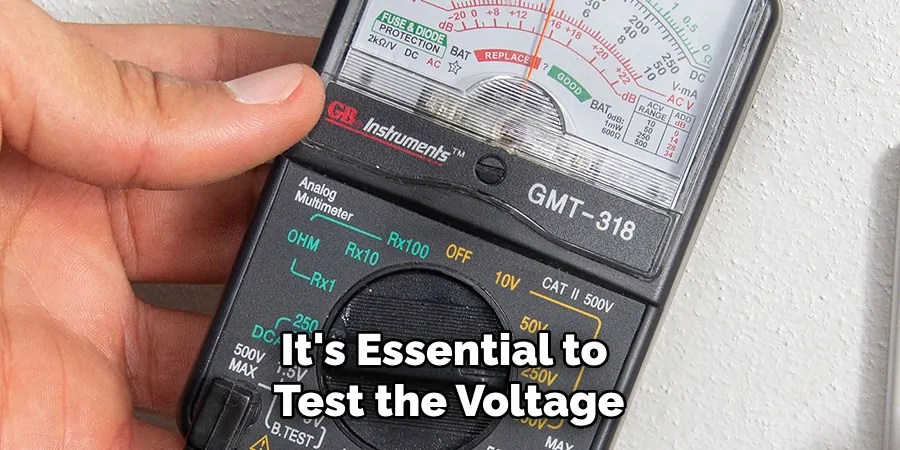
After verifying the resistance, it’s essential to test the voltage to ensure the ignition module receives adequate electrical power. Begin by reconnecting the negative terminal of the vehicle’s battery. Next, switch your multimeter to measure voltage, typically indicated by a “V” with a straight or wavy line representing direct current (DC) or alternating current (AC). Since vehicle ignition systems use DC, set the multimeter to the DC measurement.
With the vehicle’s ignition turned to the “on” position but without starting the engine, carefully probe the ignition module’s power input terminal with the multimeter’s positive lead and a known good ground point with the negative lead. Review the voltage reading displayed on the multimeter and compare it with the specifications provided in your vehicle’s service manual.
Step 6: Analyze the Voltage Readings
Once you have obtained the voltage reading, analyze it by comparing it to the specifications outlined in your vehicle’s service manual. If the voltage reading deviates significantly from the expected range, it could indicate problems with the ignition module’s power supply or the module itself. A voltage that is too low or too high can lead to poor ignition performance and should be addressed promptly.
If the voltage reading is within the specified range, it indicates that the ignition module is likely receiving the correct power, and further testing may not be necessary. However, if inconsistencies are found, inspect the wiring and connections leading to the ignition module for faults or damage. Address any issues discovered before considering replacing or repairing the ignition module itself.
Step 7: Inspect for Intermittent Issues
Even if the resistance and voltage readings fall within specification, intermittent faults can still affect the ignition module’s performance. To address this possibility, an intermittent issue inspection should be conducted. Start the engine and allow it to idle while gently wiggling the wires and connectors associated with the ignition module. Observe for any changes in engine behavior, such as misfires, stalling, or rough idling. These symptoms could indicate that movement or contact disruption affects the electrical connection. If any issues arise during this test, systematically examine each wire and connector for poor connections, corrosion, or visible damage. Secure or replace any faulty components as needed to ensure consistent operation.
Step 8: Reassemble and Test Drive the Vehicle

Once all tests and inspections are completed and necessary repairs have been made, reassemble any components or covers removed during the diagnostic process. Ensure all tools and equipment are cleared from the workspace and the vehicle is returned to normal.
After reassembly, start the engine and let it idle for a few minutes while observing its operation. If the car is running smoothly without any signs of misfires or stalls, proceed to take it for a test drive. Pay attention to the vehicle’s acceleration, idle, and overall performance to confirm that the ignition module is functioning correctly. If the vehicle operates as expected, the troubleshooting process has been successful. If issues persist, further inspection or professional diagnostics may be required.
Step 9: Document the Findings
Once you have completed the test drive and confirmed the proper functioning of the vehicle, it is essential to document your diagnostic process and findings. Record the initial symptoms, all test results, including resistance and voltage readings, any repairs or adjustments made, and the outcome of the test drive. This documentation will serve as a valuable reference for future maintenance or in the event of recurring issues. Additionally, keeping accurate records can be helpful when consulting with a professional mechanic or determining long-term vehicle health trends. Storing this information in a vehicle maintenance log can ensure that you or others clearly understand past performance and service interventions.
Step 10: Schedule Regular Maintenance
Establish a schedule for regular maintenance to ensure the continued reliable performance of the ignition module and overall vehicle health. Periodic ignition system checks can prevent future issues and extend the component’s lifespan. Follow the maintenance schedule recommended in your vehicle’s service manual, which typically includes regular checks of the ignition module, wiring, connections, and related components. During routine maintenance, pay close attention to any signs of wear and tear, corrosion, or loose connections, and address these issues as needed.
By following these steps, you can successfully diagnose and troubleshoot ignition module issues. Remember always to prioritize safety and consult a professional mechanic if needed.
Conclusion
How to test ignition module with multimeter is a critical skill for ensuring your vehicle’s reliability and performance. By systematically checking resistance, analyzing voltage readings, and inspecting for intermittent issues, you can effectively identify and address potential problems.
Adherence to safety protocols and the use of the appropriate tools are essential throughout this process. Documenting your findings provides a clear record and can aid in future troubleshooting efforts. Regular maintenance, as recommended by your vehicle’s service manual, can prevent issues and prolong the life of the ignition module.
If you encounter uncertainties or complex problems at any stage, consulting a professional mechanic is advisable.
Occupation: Expert in Hardware Tools
Education: Bachelor’s Degree in Mechanical Engineering
Profile:
Enrique Howard is a seasoned expert in the field of hardware tools, with a robust background in mechanical engineering that underpins his extensive knowledge and skills. Holding a degree in mechanical engineering, Enrique has cultivated a deep understanding of tool design, mechanics, and the intricacies of various hardware applications. His educational foundation empowers him to innovate and refine tools that enhance efficiency and effectiveness in a wide range of industries.
Professional Focus:
Enrique’s professional focus encompasses a diverse array of areas within the hardware tools sector, including:
- Tool Design and Development: Leveraging his engineering expertise, Enrique specializes in designing tools that meet specific user needs, ensuring optimal performance and durability.
- Material Science: Understanding the properties of various materials allows him to recommend the best tools for specific applications, enhancing safety and efficiency.
- Ergonomics: He emphasizes the importance of ergonomic design in tools, striving to create solutions that reduce user fatigue and improve comfort during prolonged use.
- Sustainability: Enrique is committed to promoting environmentally friendly practices in tool manufacturing, advocating for the use of sustainable materials and processes.
- Education and Training: Through workshops, seminars, and written content, he focuses on educating both professionals and DIY enthusiasts about tool selection, maintenance, and safe usage practices.
Throughout his career, Enrique has worked on numerous projects, collaborating with manufacturers and craftsmen to develop cutting-edge hardware solutions. His expertise spans from traditional hand tools to advanced power tools, allowing him to contribute significantly to both professional and DIY communities.
As an author, Enrique shares his insights through articles, guides, and tutorials, aimed at helping enthusiasts and professionals alike navigate the complexities of hardware tools. His passion for education and practical application drives him to continually explore new technologies and methodologies, making him a trusted voice in the hardware industry.
Whether he’s writing about the latest tool advancements or providing practical tips for tool maintenance, Enrique Howard is dedicated to empowering others with the knowledge and skills necessary to excel in their hardware endeavors.