
Testing a Throttle Position Sensor (TPS) with a multimeter is an essential skill for diagnosing and troubleshooting engine performance issues.
The TPS is a vital component that monitors the position of the throttle in an internal combustion engine and sends this information to the engine control unit (ECU). When the TPS malfunctions, it can lead to a host of problems such as stalling, hesitation, or inconsistent acceleration. By using a multimeter to test the TPS, you can determine if it’s functioning correctly and ensure that your vehicle maintains optimal performance and fuel efficiency.
In this guide on how to test a tps sensor with a multimeter, we’ll walk you through the steps necessary to accurately test your TPS, helping you to identify and resolve potential issues with ease.
Why Test Your TPS Sensor?
As mentioned earlier, the TPS plays a crucial role in the proper functioning of your vehicle’s engine. Monitoring and relaying throttle position information to the ECU helps maintain optimal air-to-fuel ratio and ignition timing, ensuring smooth acceleration and efficient fuel consumption. A malfunctioning TPS can disrupt this delicate balance, leading to a variety of performance issues.
Additionally, testing your TPS with a multimeter is a quick and cost-effective way to diagnose potential problems before they become more severe. It can save you time and money by pinpointing the root cause of engine performance issues accurately.
Tools You’ll Need
To test your TPS with a multimeter, you’ll need the following tools:
- A Digital Multimeter
- A Set of Safety Gloves and Goggles
- A Set of Pliers or Wrench (Depending on Your Vehicle’s Make and Model)

8 Steps on How to Test a Tps Sensor With a Multimeter
Step 1: Prepare Your Vehicle
Before beginning the test, ensure that your vehicle is parked on a flat, level surface with the ignition turned off. Engage the parking brake to prevent any unintentional movement. Open the hood and locate the throttle body, which houses the TPS. It’s advisable to consult your vehicle’s manual if you’re unsure about the exact location.
Once you identify the TPS, disconnect the battery to ensure safety while handling electrical components. Make sure to wear your safety gloves and goggles to protect yourself from any accidental sparks or chemical exposure. With the area prepared and all safety precautions in place, you’re ready to proceed with testing the TPS.
Step 2: Set Up Your Multimeter
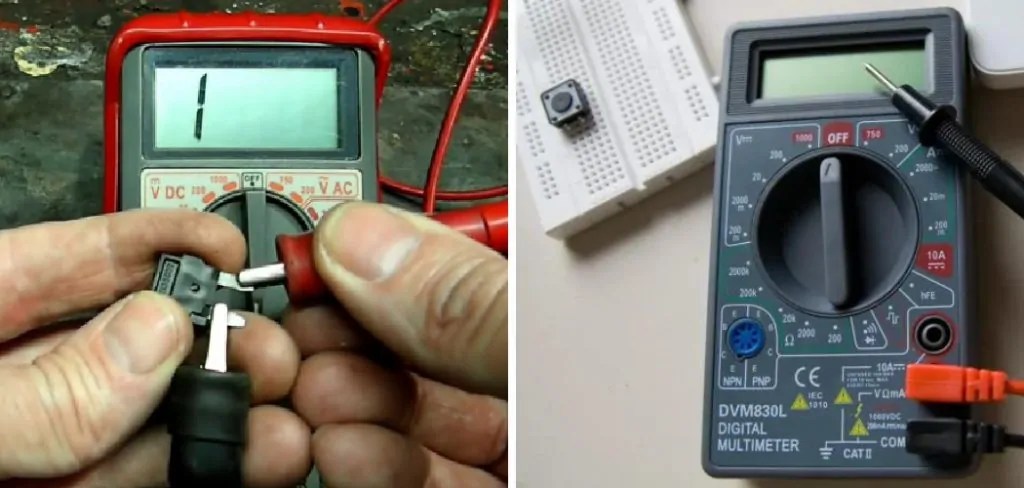
Once your vehicle is prepared, it’s time to set up your digital multimeter. Turn on the multimeter and set it to the voltage measurement setting; you’ll typically use the 20V DC range since most vehicle sensors operate within this range.
Ensure that your multimeter leads, the red positive and the black negative, are properly connected and functional. Before proceeding, double-check that your multimeter is calibrated correctly for accurate readings. With the multimeter ready, move on to the next step, where you’ll connect it to the TPS to begin the actual testing process.
Step 3: Connect the Multimeter to the TPS Sensor
With your multimeter set up, locate the two terminals on the TPS; one will be labeled as ground while the other is signal voltage. You can refer to your vehicle’s manual if you’re unsure about which terminal corresponds to which function.
Using a set of pliers or wrench (depending on your vehicle), loosen the bolts holding down the TPS and disconnect its electrical connector. Take care not to damage any wires in this process. Once disconnected, connect the positive lead of your multimeter to the signal voltage terminal and negative lead to a clean engine ground.
Step 4: Measure Idle Voltage
With the multimeter connected to the TPS, turn on your vehicle’s ignition, but do not start the engine. Observe and note down the voltage reading on your multimeter; it should typically range between 0.2V to 1.0V for most vehicles.
If the voltage reading is outside of this range, it may indicate a faulty TPS that requires further testing or replacement. However, if the idle voltage falls within the specified range, proceed to step five to test the full throttle voltage.
Step 5: Measure Full Throttle Voltage
With the engine still off, press down on your vehicle’s accelerator pedal slowly. As you approach full-throttle position, observe and note down the voltage reading on your multimeter. The full throttle voltage should typically range between 3.5V to 4.5V for most vehicles.

If the voltage reading is outside of this range, it may indicate a faulty TPS that requires further testing or replacement. However, if the full throttle voltage falls within the specified range, proceed to step six to test the sweep test.
Step 6: Perform Sweep Test
The sweep test involves gradually increasing and decreasing the throttle position while observing the corresponding voltage changes on your multimeter. Begin by slowly pressing down on your vehicle’s accelerator pedal and note down the voltage readings at various points along the way until you reach the full-throttle position. Repeat this process while releasing the accelerator pedal until it returns to the idle position.
If you notice inconsistent or erratic voltage readings during this test, it may indicate a faulty TPS that requires further testing or replacement. However, if the voltage readings remain consistent and within the specified ranges, proceed to step seven for a final check.
Step 7: Inspect For Any Physical Damage
At this stage, you’ve successfully tested your TPS with a multimeter and obtained accurate voltage readings at different throttle positions. However, before reinstalling the TPS and reconnecting its electrical connector, take a moment to inspect it for any visible physical damage such as wear and tear or corrosion.
If you notice any damage, it’s best to replace the TPS to avoid any future performance issues. However, if there is no physical damage, proceed to step eight for a final check before reinstalling the TPS and reconnecting its electrical connector.
Step 8: Reconnect and Test
With the testing process complete, carefully reconnect the TPS wiring harness and tighten the bolts holding it in place. Reconnect your vehicle’s battery and start your engine to ensure that everything is functioning correctly.
If you notice any improvements in your vehicle’s performance or if all voltage readings fell within the specified ranges during testing, then congratulations! You’ve successfully tested your TPS with a multimeter. Remember to clear any error codes if your vehicle displays them and take a test drive to confirm that the issue has been resolved. If there are still performance issues, it’s best to consult a mechanic for further diagnosis.

Additional Tips
- It’s essential to perform this test with the engine off to avoid any potential safety hazards.
- Always disconnect the battery before handling electrical components on your vehicle.
- If you’re unsure about the readings or have any doubts, it’s best to consult a mechanic for further assistance.
- Regularly testing and maintaining your TPS can help prevent potential performance issues and save you from costly repairs in the long run.
- In some cases, a faulty TPS may not throw error codes or display noticeable symptoms, making it crucial to regularly test it as part of routine maintenance.
- If you find that your TPS is consistently failing or showing irregular readings, it may be indicative of a larger underlying issue that requires further diagnosis and repair. It’s best to consult a mechanic in this scenario.
- If you’re unsure about the proper procedure for testing your TPS or any other vehicle component, always refer to your vehicle’s manual for detailed instructions specific to your make and model.
- Remember to always handle electrical components with caution and care, as they can be delicate and easily damaged.
- Don’t forget to properly disconnect and remove any tools or equipment used during the testing process before starting your vehicle. Safety should always be a top priority when working on vehicles.
- Regular maintenance and testing of all vehicle components can help extend its lifespan and ensure optimal performance. So, make sure to include TPS testing as part of your regular vehicle maintenance routine.
- If you’re experiencing recurring issues with your TPS, it may be worth investing in a high-quality, reliable replacement component from a reputable brand to prevent future issues. Overall, a well-maintained TPS can help improve your vehicle’s performance and fuel efficiency, leading to a smoother and more enjoyable driving experience. Happy testing!
With these step-by-step guidelines on how to test a tps sensor with a multimeter, you can easily diagnose and troubleshoot any potential issues with your vehicle’s TPS. Regularly testing and maintaining this vital component can help prevent future problems and ensure optimal performance from your vehicle.

Conclusion
Testing your Throttle Position Sensor (TPS) with a multimeter is a crucial step in diagnosing and ensuring your vehicle’s optimal performance. Through the step-by-step process on how to test a tps sensor with a multimeter outlined, you can effectively identify any issues with your TPS, ensuring precise throttle response and efficient engine operation.
Regular testing as part of your vehicle’s routine maintenance can prevent unforeseen performance problems and costly repairs down the line. Remember to always prioritize safety, consult your vehicle’s manual for specific guidance, and seek professional help if needed. With careful attention and maintenance, you can enjoy a reliable and smooth driving experience.
Occupation: Expert in Hardware Tools
Education: Bachelor’s Degree in Mechanical Engineering
Profile:
Enrique Howard is a seasoned expert in the field of hardware tools, with a robust background in mechanical engineering that underpins his extensive knowledge and skills. Holding a degree in mechanical engineering, Enrique has cultivated a deep understanding of tool design, mechanics, and the intricacies of various hardware applications. His educational foundation empowers him to innovate and refine tools that enhance efficiency and effectiveness in a wide range of industries.
Professional Focus:
Enrique’s professional focus encompasses a diverse array of areas within the hardware tools sector, including:
- Tool Design and Development: Leveraging his engineering expertise, Enrique specializes in designing tools that meet specific user needs, ensuring optimal performance and durability.
- Material Science: Understanding the properties of various materials allows him to recommend the best tools for specific applications, enhancing safety and efficiency.
- Ergonomics: He emphasizes the importance of ergonomic design in tools, striving to create solutions that reduce user fatigue and improve comfort during prolonged use.
- Sustainability: Enrique is committed to promoting environmentally friendly practices in tool manufacturing, advocating for the use of sustainable materials and processes.
- Education and Training: Through workshops, seminars, and written content, he focuses on educating both professionals and DIY enthusiasts about tool selection, maintenance, and safe usage practices.
Throughout his career, Enrique has worked on numerous projects, collaborating with manufacturers and craftsmen to develop cutting-edge hardware solutions. His expertise spans from traditional hand tools to advanced power tools, allowing him to contribute significantly to both professional and DIY communities.
As an author, Enrique shares his insights through articles, guides, and tutorials, aimed at helping enthusiasts and professionals alike navigate the complexities of hardware tools. His passion for education and practical application drives him to continually explore new technologies and methodologies, making him a trusted voice in the hardware industry.
Whether he’s writing about the latest tool advancements or providing practical tips for tool maintenance, Enrique Howard is dedicated to empowering others with the knowledge and skills necessary to excel in their hardware endeavors.