
Testing a 4-wire coil on plug with a multimeter is a crucial skill for diagnosing ignition problems in modern engines. Coil on plug systems are used to deliver spark directly to each cylinder, which improves engine efficiency and performance.
However, when these coils fail, they can lead to misfires, poor fuel economy, and engine hesitation. By using a multimeter, you can evaluate the health of the coil, check for proper resistance, and ensure that the coil is receiving the correct voltage.
This guide on how to test 4 wire coil on plug with multimeter will walk you through the steps necessary to perform this test safely and accurately, helping you to pinpoint any potential issues and maintain optimal engine performance.
Why Test a 4-Wire Coil on Plug?
While coil on plug systems are designed to be reliable, they can still fail due to factors such as heat, wear and tear, and electrical issues. Testing the coil with a multimeter can help you determine if it is functioning properly or needs to be replaced.
Moreover, diagnosing a faulty coil early on can save you from costly repairs in the future. It can also prevent further damage to other components of the ignition system.
Needed Materials
Before you start testing, make sure you have the following materials on hand:
A Multimeter:
You will need a multimeter to perform this test. A digital multimeter is recommended for its accuracy and ease of use.
Safety Gear:
Always wear safety gear such as gloves and eye protection when working on the ignition system.
Wiring Diagram:
Having a wiring diagram specific to your vehicle can help identify which wires you need to test.

9 Steps on How to Test 4 Wire Coil on Plug With Multimeter
Step 1: Consult the Vehicle’s Manual
The first step in testing a 4-wire coil on a plug with a multimeter is to consult the vehicle’s manual. This essential document provides valuable information about the specific wiring configuration and color codes used in your vehicle’s ignition system.
By familiarizing yourself with these details, you can accurately identify the wires connected to the coil and perform the test without causing damage to the system. The manual will also include any specific precautions or guidelines necessary for working with your vehicle’s electrical components safely.
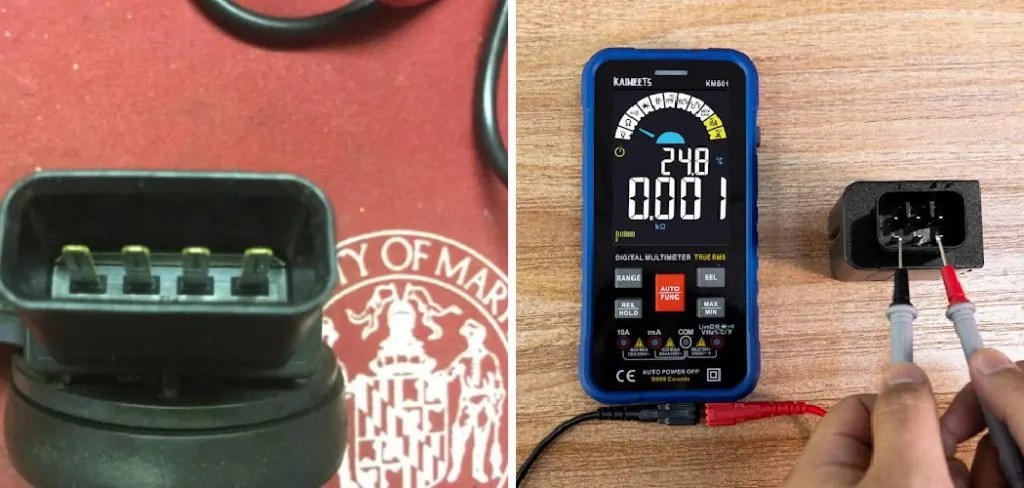
Step 2: Locate the Ignition Coil
The next step is to locate the ignition coil. In most vehicles, the ignition coil is located on top of the engine and is connected to each spark plug through individual wires. You may need to remove some parts or covers to access the coil.
The coil will have four wires, each connected to a spark plug. These are the wires you will be testing.
Step 3: Set the Multimeter
Once you have located the ignition coil, it’s time to set up the multimeter for testing. Begin by turning on your digital multimeter and selecting the resistance (ohms) setting. This setting is typically indicated by the symbol Ω on the multimeter’s dial. If your multimeter has multiple ranges for measuring resistance, choose the appropriate range that corresponds with the expected resistance values in your vehicle’s coil specifications, as found in the vehicle’s manual.
Properly calibrating your multimeter ensures that you receive accurate test results, allowing you to diagnose any issues with the ignition coil effectively.
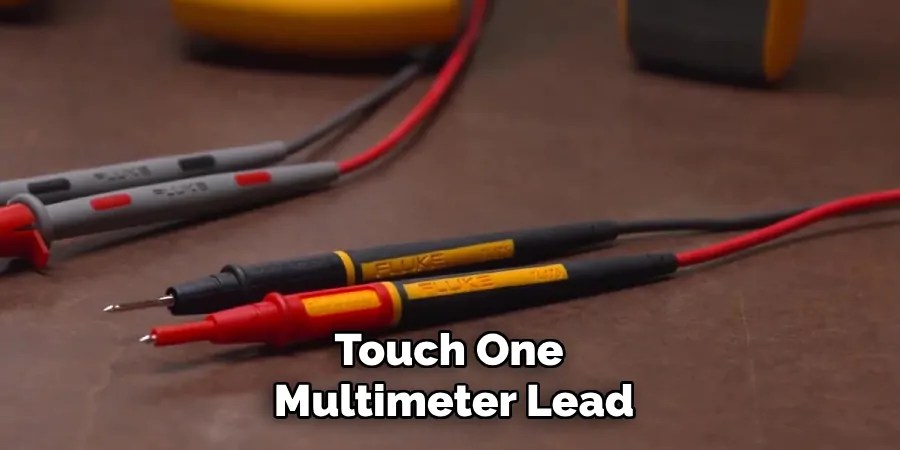
Step 4: Test the Primary Coil
The primary coil is responsible for receiving voltage from the battery and sending it to the secondary coil, which then produces high-voltage sparks. To test the primary coil, you will need to touch one multimeter lead to the positive terminal of the ignition coil and the other lead to each of the four wires connected to each spark plug.
If your multimeter displays a resistance value between 0.5 ohms and 2 ohms, this indicates that the primary coil is functioning correctly. Any value outside of this range may indicate an issue with the primary coil.
Step 5: Test the Secondary Coil
Next, you will need to test the secondary coil, which is responsible for producing high-voltage sparks. To do this, touch one multimeter lead to the negative terminal of the ignition coil and the other lead to each of the four wires connected to each spark plug.
A resistance value between 5k ohms and 20k ohms is considered normal for a healthy secondary coil. Any value outside of this range may indicate an issue with the secondary coil.
Step 6: Check for Voltage
After testing the resistance in both primary and secondary coils, you can also check for voltage by setting your multimeter to measure DC voltage. With the engine running, touch one lead to the positive terminal and one lead to ground.
If the voltage reading is within the specified range in your vehicle’s manual, this indicates that the coil is receiving the correct voltage from the battery.
Step 7: Compare Results
Comparing the results of all three tests can help you determine if there are any issues with your ignition coil. If all values fall within their respective ranges, this indicates that your coil is functioning correctly. Any values outside of these ranges may indicate a problem with either the primary or secondary coil.
If one or more values fall outside of their respective ranges, this may indicate a faulty coil that needs to be replaced.
Step 8: Repeat the Test
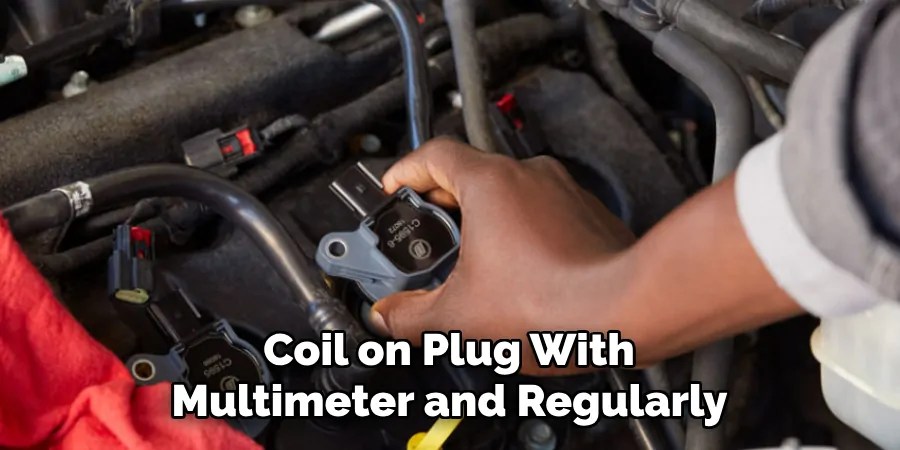
If you suspect there may be an issue with your ignition coil but all test results are within their specified ranges, it may still be beneficial to repeat the test after driving for a while. This can help identify any issues that only occur when the engine is warm or under specific conditions.
You may also want to consider performing the test on a regular basis as part of your vehicle’s maintenance routine, as this can help identify any potential issues early on.
Step 9: Seek Professional Help
If you are unsure about how to perform this test or have any concerns about your ignition coil, it is always best to seek professional help. A trained mechanic or technician will have the necessary knowledge and tools to accurately diagnose and repair any issues with your vehicle’s ignition system.
Following these steps on how to test 4 wire coil on plug with multimeter and regularly testing your 4-wire coil on plug with a multimeter can help ensure the optimal performance of your ignition system, leading to a smoother and more efficient driving experience. Remember to always prioritize safety when working on any electrical components in your vehicle.
Frequently Asked Questions
Q: Can I Test My 4-wire Coil on Plug With a Multimeter Without Consulting the Vehicle’s Manual?
A: It is not recommended to test your ignition coil without consulting the vehicle’s manual first. The manual provides important information about the specific wiring configuration and color code used in your vehicle’s ignition system, which is crucial for accurately identifying the wires connected to the coil and performing the test without causing damage.
Q: What Are Some Common Symptoms of a Faulty Ignition Coil?
A: Some common symptoms of a faulty ignition coil include difficulty starting the engine, misfires or stalling, decreased fuel efficiency, and a lit up check engine light. If you experience any of these issues, it’s important to have your ignition system checked by a professional mechanic.
Q: How Often Should I Test My 4-wire Coil on Plug With a Multimeter?
A: It is recommended to perform this test as part of your regular vehicle maintenance routine. This can help identify any potential issues with your ignition system early on and prevent more significant problems in the future. It is also a good idea to repeat the test after driving for a while, as issues may only occur when the engine is warm or under specific conditions. Overall, it’s best to consult your vehicle’s manual for specific recommendations on testing frequency.
Q: Can I Perform This Test if My Vehicle Has a Different Number of Wires Connected to the Coil?
A: The steps outlined above are specifically for testing a 4-wire coil on plug with a multimeter. If your vehicle has a different number of wires connected to the coil, it’s best to consult your vehicle’s manual for specific instructions on how to test it. Alternatively, you can also seek professional help from a mechanic or technician. Remember, always prioritize safety when working with electrical components in your vehicle.

Conclusion
Regularly testing your 4-wire coil on plug with a multimeter is an essential aspect of maintaining your vehicle’s ignition system. By following the outlined steps on how to test 4 wire coil on plug with multimeter—including consulting the vehicle’s manual, accurately setting up your multimeter, and performing thorough checks on both the primary and secondary coils—you can proactively identify and address potential issues before they lead to more significant problems.
Ensuring that your ignition coil is functioning correctly not only contributes to a more efficient and reliable vehicle performance but also enhances safety on the road. Should you find any discrepancies during your tests or if you’re ever in doubt, seeking professional assistance is always recommended to ensure your vehicle remains in optimal condition.
Occupation: Expert in Hardware Tools
Education: Bachelor’s Degree in Mechanical Engineering
Profile:
Enrique Howard is a seasoned expert in the field of hardware tools, with a robust background in mechanical engineering that underpins his extensive knowledge and skills. Holding a degree in mechanical engineering, Enrique has cultivated a deep understanding of tool design, mechanics, and the intricacies of various hardware applications. His educational foundation empowers him to innovate and refine tools that enhance efficiency and effectiveness in a wide range of industries.
Professional Focus:
Enrique’s professional focus encompasses a diverse array of areas within the hardware tools sector, including:
- Tool Design and Development: Leveraging his engineering expertise, Enrique specializes in designing tools that meet specific user needs, ensuring optimal performance and durability.
- Material Science: Understanding the properties of various materials allows him to recommend the best tools for specific applications, enhancing safety and efficiency.
- Ergonomics: He emphasizes the importance of ergonomic design in tools, striving to create solutions that reduce user fatigue and improve comfort during prolonged use.
- Sustainability: Enrique is committed to promoting environmentally friendly practices in tool manufacturing, advocating for the use of sustainable materials and processes.
- Education and Training: Through workshops, seminars, and written content, he focuses on educating both professionals and DIY enthusiasts about tool selection, maintenance, and safe usage practices.
Throughout his career, Enrique has worked on numerous projects, collaborating with manufacturers and craftsmen to develop cutting-edge hardware solutions. His expertise spans from traditional hand tools to advanced power tools, allowing him to contribute significantly to both professional and DIY communities.
As an author, Enrique shares his insights through articles, guides, and tutorials, aimed at helping enthusiasts and professionals alike navigate the complexities of hardware tools. His passion for education and practical application drives him to continually explore new technologies and methodologies, making him a trusted voice in the hardware industry.
Whether he’s writing about the latest tool advancements or providing practical tips for tool maintenance, Enrique Howard is dedicated to empowering others with the knowledge and skills necessary to excel in their hardware endeavors.