
Are you tired of wrestling with a stubborn chainsaw clutch that just won’t budge? Sick of wasting hours trying to figure out the secret to removing it without causing any damage? Well, you’re in luck! In this blog post, we will be diving deep into the world of chainsaw maintenance and showing you step-by-step how to remove a chainsaw clutch like a pro.

Whether you’re a seasoned lumberjack or a DIY enthusiast looking to tackle your own backyard projects, this guide on how to remove chainsaw clutch will equip you with all the knowledge and tools you need to conquer the tricky task of detaching a chainsaw clutch. So grab your safety goggles and get ready to conquer those chainsaw woes once and for all!
Needed Materials
Given that chainsaws come in different sizes and models, before getting started make sure you have the following materials:
- Wrench Set
- Flathead Screwdriver
- Socket Wrench Set
- Clean Rags or Towels
- Cleaning Solvent/chain Degreaser
11 Step-by-step Guidelines on How to Remove Chainsaw Clutch
Step 1: Preparation is Key
Before attempting to remove a chainsaw clutch, make sure to disconnect the spark plug and drain any fuel from the chainsaw. This will ensure your safety during the process and prevent any potential accidents. It’s also a good idea to have a clean workspace and all the necessary materials at hand. It’s important to work with caution as chainsaw clutches are delicate and can easily break if not handled properly.
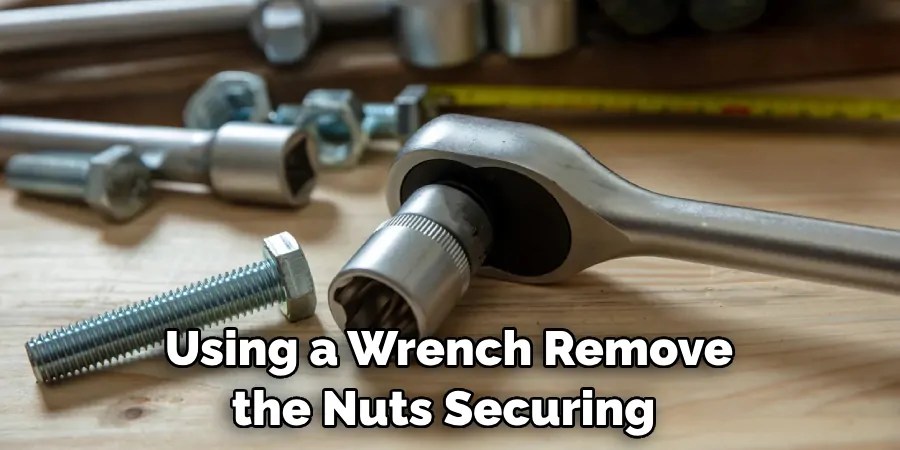
Step 2: Remove the Chainsaw Cover
Using a wrench, remove the nuts securing the chainsaw cover and take off the cover. This will give you access to the clutch assembly. You may also want to clean the area before proceeding further. But be careful not to damage the clutch drum or any other parts while doing so. It’s best to use a clean rag or towel and avoid using any harsh cleaning agents.
Step 3: Remove the Clutch Drum
Next, you will need to remove the clutch drum by unscrewing the bolt in the center. This may require a socket wrench set, depending on the model of your chainsaw. Be sure to keep track of all parts and screws as you remove them to avoid losing or misplacing them. It’s also a good idea to take pictures or make notes of the disassembly process for easier reassembly. But if you’re confident in your memory, feel free to skip this step.
Step 4: Remove the Clutch Plates
Once the clutch drum is removed, you will see a series of plates stacked on top of each other. These are the clutch plates and they will need to be removed in order to access the clutch itself. Use a flathead screwdriver to gently pry them apart, making sure not to bend or damage them. You may need to rotate the plates until they come loose.
Step 5: Remove the Clutch Assembly
With the clutch plates removed, you will now have access to the clutch assembly. It’s important to handle this part with care as it is delicate and can easily break. Use a wrench or socket set to remove the bolt in the center of the clutch assembly. Be sure to hold onto the clutch assembly as you remove the bolt, as it may fall off. Otherwise, you risk damaging it.
Step 6: Clean the Clutch
With the clutch removed, now is a good time to clean it using a cleaning solvent or chain degreaser. Be sure to follow the instructions on the product and use gloves to protect your hands. It’s important to remove any dirt, debris, or old oil that may have accumulated on the clutch to ensure smooth operation.
Step 7: Inspect for Damages
While you have the clutch removed, it’s a good idea to inspect it for any damages. Look for signs of wear and tear, cracks, or other issues. If you notice any damage, it may be time to replace the clutch altogether. It’s always better to be safe than sorry when it comes to the important components of your chainsaw. You don’t want to risk any accidents or malfunctions due to a faulty clutch.
Step 8: Reassemble the Clutch Assembly
Once you have cleaned and inspected the clutch, it’s time to reassemble it. Simply reverse the steps from before, starting with placing the clutch assembly back in its place and securing it with a bolt. Then add the clutch plates, making sure they are aligned properly. Finally, put the clutch drum back in place and secure it with a bolt as well.

Step 9: Tighten the Bolts
After reassembling everything, be sure to tighten all the bolts and nuts securely. You don’t want any loose parts that may cause problems while using your chainsaw. It’s also a good idea to check the tension of the chain and adjust it if necessary. It’s important to have a properly tensioned chain for safe and efficient operation. But if you’re not sure how to do this, it’s best to consult the manufacturer’s manual.
Step 10: Reattach the Chainsaw Cover
Once everything is put back together, it’s time to reattach the chainsaw cover. Simply place it back into position and secure it with the nuts using a wrench. You may also want to clean the cover before putting it back on. And voila, your chainsaw is now ready to go! This may have seemed like a lot of steps, but with practice, you will be able to remove and reattach the clutch in no time.
Step 11: Regular Maintenance is Key
Now that you know how to remove a chainsaw clutch, it’s important to remember to regularly maintain your chain and clutch to prevent any potential issues. This includes cleaning and lubricating the chain, checking tension, and inspecting for damages. Regular maintenance will not only prolong the life of your chainsaw but also ensure safe operation every time you use it.
Following these steps on how to remove chainsaw clutch, you should now be able to confidently remove a chainsaw clutch and reassemble it with ease. As with any machinery, safety is always the top priority, so be sure to take precautions and work carefully while handling delicate parts. And remember, regular maintenance is key to keeping your chainsaw running smoothly for years to come. Happy cutting!
Additional Tips
- If You’re Unsure About Any Step or Don’t Feel Confident in Your Abilities, It’s Always Best to Consult the Manufacturer’s Manual or Seek Professional Help.
- It’s a Good Idea to Wear Protective Gear Such as Gloves and Safety Glasses While Working on Your Chainsaw.
- Always Disconnect the Spark Plug and Drain Fuel Before Attempting to Remove a Chainsaw Clutch. This Will Prevent Any Accidental Starts or Fuel Spills.
- If You Notice Any Unusual Noises or Vibrations While Using Your Chainsaw, It’s Best to Stop and Inspect the Clutch for Any Issues Before Continuing. This Could Indicate a Problem That Needs to Be Addressed Immediately. So, Always Stay Alert and Cautious While Using Your Chainsaw.
- It’s Important to Use High-quality Replacement Parts When Reassembling Your Chainsaw Clutch. This Will Ensure the Proper Functioning and Longevity of Your Chainsaw.
- Don’t Force Any Parts While Disassembling or Reassembling the Clutch. If Something Doesn’t Seem to Fit, Double-check and Make Sure You’re Using the Correct Tools and Following the Steps Correctly.
- Regularly Check for Any Loose Bolts or Parts in Your Chainsaw to Avoid Any Potential Accidents or Malfunctions.
- Finally, Always Remember to Handle Your Chainsaw With Care and Follow Proper Safety Precautions for a Successful and Safe Operation.

Frequently Asked Questions
Q: Can I Remove the Chainsaw Clutch Without Any Tools?
A: No, you will need a wrench or socket set to remove the bolt in the center of the clutch assembly. It’s important to use the correct tools for safe and successful disassembly. You may also need a clutch removal tool for certain types of chainsaws.
Q: How Often Should I Clean and Inspect My Chainsaw Clutch?
A: It’s recommended to clean and inspect your chainsaw clutch every time you notice a decrease in performance or before any big cutting job. Regular maintenance is key to preventing potential problems and ensuring the safe operation of your chainsaw.
Q: Can I Replace the Clutch Assembly Myself?
A: While it is possible to replace the clutch assembly on your own, it’s important to have the necessary knowledge and skills to do so. If you’re unsure or uncomfortable with the process, it’s best to seek professional help.

Conclusion
So, by now we have learned everything necessary to make sure our chainsaw’s clutch is removed safely and correctly. We need to make sure the chainsaw is unplugged and switched off before being worked on. After this, it’s time to remove the bar and chain – unscrewing each of the nuts that secure them in place.
Once they’re off, it’s just a matter of taking out any remaining old parts or debris before replacing them with new components as needed. If necessary, the bearings and centrifugal clutch can also be replaced.
Finally, if none of these methods on how to remove chainsaw clutch work, there are always professional mechanics available who will happily guide us through the clove removal process. So don’t hesitate if you’re feeling stuck – there’s help around! Now go ahead and get started on your own chain saw project for a stress-free experience today!
Occupation: Expert in Hardware Tools
Education: Bachelor’s Degree in Mechanical Engineering
Profile:
Enrique Howard is a seasoned expert in the field of hardware tools, with a robust background in mechanical engineering that underpins his extensive knowledge and skills. Holding a degree in mechanical engineering, Enrique has cultivated a deep understanding of tool design, mechanics, and the intricacies of various hardware applications. His educational foundation empowers him to innovate and refine tools that enhance efficiency and effectiveness in a wide range of industries.
Professional Focus:
Enrique’s professional focus encompasses a diverse array of areas within the hardware tools sector, including:
- Tool Design and Development: Leveraging his engineering expertise, Enrique specializes in designing tools that meet specific user needs, ensuring optimal performance and durability.
- Material Science: Understanding the properties of various materials allows him to recommend the best tools for specific applications, enhancing safety and efficiency.
- Ergonomics: He emphasizes the importance of ergonomic design in tools, striving to create solutions that reduce user fatigue and improve comfort during prolonged use.
- Sustainability: Enrique is committed to promoting environmentally friendly practices in tool manufacturing, advocating for the use of sustainable materials and processes.
- Education and Training: Through workshops, seminars, and written content, he focuses on educating both professionals and DIY enthusiasts about tool selection, maintenance, and safe usage practices.
Throughout his career, Enrique has worked on numerous projects, collaborating with manufacturers and craftsmen to develop cutting-edge hardware solutions. His expertise spans from traditional hand tools to advanced power tools, allowing him to contribute significantly to both professional and DIY communities.
As an author, Enrique shares his insights through articles, guides, and tutorials, aimed at helping enthusiasts and professionals alike navigate the complexities of hardware tools. His passion for education and practical application drives him to continually explore new technologies and methodologies, making him a trusted voice in the hardware industry.
Whether he’s writing about the latest tool advancements or providing practical tips for tool maintenance, Enrique Howard is dedicated to empowering others with the knowledge and skills necessary to excel in their hardware endeavors.