
Are you having trouble opening your Kobalt ratcheting wrench set? Do the screws on the wrench end seem frozen in place and refuse to budge no matter how hard you try? Look no further than this handy guide!

A ratcheting wrench set is a must-have for any toolbox. They make work easier by allowing you to grip and turn nuts and bolts without removing the entire tool from the fastener with each motion. Kobalt makes some of the best ratcheting wrench sets on the market.
This guide will show you how to open Kobalt ratcheting wrench set and get started using it. Ratchet wrenches are incredibly useful for loosening or tightening screws and bolts, so having one in your toolbox is essential. Keep reading to learn more.
What Will You Need?
- A Kobalt ratcheting wrench set in the size and style that you need.
- Some 3-in-1 oil or another lubricant, such as WD40 or silicone spray.
- A flathead screwdriver or Allen key, depending on how your ratchet wrench is designed.
Before starting, be sure to read through all of the instructions included with your ratcheting wrench set so that you are familiar with how it works and how to take it apart properly in case any parts get stuck when you open it up again later on.
10 Easy Steps on How to Open Kobalt Ratcheting Wrench Set
Step 1. Locate the Adjustment Knob:
This is typically at the end of the wrench, where you would grip it to turn a screw or bolt. Ensure that the knob is loose and in its lowest position. Because ratcheting wrenches come in all different shapes and sizes, your adjustment knob may look slightly different from the one pictured here.
Step 2. Apply Lubricant:
Generously apply the lubricant to your wrench’s knob and other moving parts. Be sure to do this before opening the wrench, as it will help prevent parts from getting stuck or frozen. If the knob feels very stiff and difficult to turn, you may want to try a heavier spray like WD40 instead of 3-in-1 oil.
Step 3. Turn the Adjustment Knob:
Using either your fingers or a flathead screwdriver, turn the adjustment knob in a counterclockwise direction until it is fully loosened. Keep turning until you feel some resistance, and then stop, as this indicates that the wrench has opened up all the way. You can use a flathead screwdriver to help if the knob feels too stiff to turn by hand.
Step 4. Remove Wrench Head:
Once your ratcheting wrench is completely open, you should be able to pull off one of the wrench heads attached to the handle. This head may have screws or bolts that need to be removed first so make sure they are loose before attempting to remove it.

Don’t force the wrench head off if it feels stuck, as doing so may damage the tool. Instead, try a little more lubricant or gently tapping on the wrench head with a hammer to help loosen it up.
Step 5. Remove Remaining Wrench Head:
Once the first wrench head is removed, you should be able to pull off the other head from the handle easily. Again, this may require loosening any screws or bolts first, so make sure they are not stuck before removing them. If you are having trouble, use a flathead screwdriver to help pry the wrench head loose.
Step 6. Clean Wrench Head:
After removing both wrench heads from your ratcheting wrench set, give them a thorough cleaning with some mild soap and water to remove any dirt or debris that might have accumulated over time. This will ensure that they work smoothly when it comes time to reattach them to your tool again. Another option is to apply a bit more lubricant, such as silicone spray or WD40.
Step 7. Reattach Wrench Head:
Once your wrench heads are clean, reattach them to the handle. Start with the first head. Make sure all the screws or bolts are firmly tightened before moving on to the next one.
Step 8. Close Wrench:
Carefully close up your ratcheting wrench set by twisting the adjustment knob in a clockwise direction. If you have difficulty closing it, try adding a bit more lubricant and turning the wrench back and forth several times to help loosen things up again. Don’t force it closed if you feel like parts are getting stuck though, as this could damage your tool.
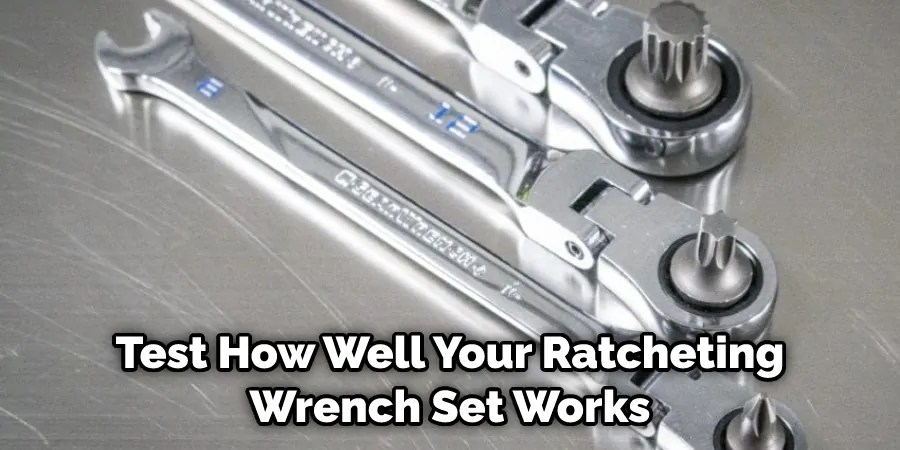
Step 9. Test Wrench:
To test how well your ratcheting wrench set works, grab an object like a screw or bolt and try turning it with your wrench. If the tool is functioning properly, you should be able to easily turn the object while still being able to ratchet back and forth as needed.
You can also try tightening or loosening a nut and bolt to see how well the wrench can hold them in place. If you notice that your ratcheting wrench is not working as smoothly as it once did, take some time to clean it up and apply more lubricant to help ensure that it continues to work flawlessly for years to come.
Step 10. Maintain Wrench:
To keep your ratcheting wrench set in good condition for years to come, be sure to apply lubricant regularly as needed and take care when using it around other tools that might damage its surfaces. Additionally, store your wrench set in a cool, dry place away from direct sunlight whenever possible. Proper maintenance allows you to enjoy years of reliable use from this handy tool!
By following these steps, you can learn how to open and use your kobalt ratcheting wrench set effectively. Whether you need to remove stuck parts, tighten bolts and screws, or perform other tasks around the home or workshop, this handy tool is sure to come in handy for all of your projects. So what are you waiting for? Give it a try today!
5 Additional Tips and Tricks
- Before you begin, ensure your ratcheting wrench set is fully assembled and the individual wrenches are securely fastened to the handle.
- To open a bolt or nut with your ratcheting wrench set, start by placing the tip of one of the wrenches onto the head of the bolt or nut.
- Grip the ratcheting mechanism firmly in one hand, then gently turn it counterclockwise to loosen the bolt or nut. Continue doing this until it is completely removed from whatever you try to tighten or loosen.
- If necessary, apply some lubricant or spray oil onto any joints or moving parts in your ratcheting wrench set before use to keep them in good working condition.
- Finally, make sure to keep your ratcheting wrench set clean and well-maintained at all times by wiping down the wrenches and handles with a damp cloth as needed.
This will help ensure that they work properly every time you need them.
5 Things You Should Avoid
- Never use your ratcheting wrench set on very small or delicate bolts or nuts, as these may get damaged or stripped.
- Avoid applying too much pressure to the ratchet mechanism when you’re tightening or loosening a bolt or nut, as this can cause it to break prematurely.
- Never force a stuck bolt or nut open with your ratcheting wrench set, as you could damage the tool itself and/or cause more damage to whatever you’re trying to fix.
- Avoid using your ratcheting wrench set for tasks that are outside of its intended use, such as working on heavy machinery or other large projects where heavy-duty tools are needed.
- Finally, try to avoid dropping your ratcheting wrench set, as this can cause damage to the wrenches and/or the handle.

With proper care and maintenance, however, your ratcheting wrench set should last for years to come.
Why is an Open End Wrench Angled?
There are a few different reasons open-end wrenches are angled compared to other types of wrenches. One key factor is that the angle makes it easier for users to access hard-to-reach bolts and nuts, allowing them to get the job done more quickly and efficiently. In addition, this unique design allows for greater torque and gripping power, which can help users better handle heavy loads or tough materials.
Finally, the angled shape also helps prevent slippage, ensuring that your wrench stays firmly in place as you work. Whether you’re working on a home repair project or tackling a complex industrial task, an open-end wrench with an angled design can be an invaluable tool to have at your disposal.
Conclusion
Now that you know how to open a Kobalt ratcheting wrench set, nothing stops you from taking on any task. With this new tool in your arsenal, you’re ready to tackle anything that comes your way. Arm yourself with the knowledge of how to use it, and nothing will be able to stand in your way.

By following the steps outlined in this blog post, you’ll be able to easily open your Kobalt ratcheting wrench set. This is a great tool to have on hand for opening stuck lids or getting into tight spaces.
Hopefully, the article on how to open Kobalt ratcheting wrench set was helpful and informative. With this knowledge, you’ll be able to get the most out of your wrench and tackle whatever projects come your way with ease. So what are you waiting for? Go give it a try!
You Can Check It Out Tighten Spark Plugs without A Torque Wrench
Occupation: Expert in Hardware Tools
Education: Bachelor’s Degree in Mechanical Engineering
Profile:
Enrique Howard is a seasoned expert in the field of hardware tools, with a robust background in mechanical engineering that underpins his extensive knowledge and skills. Holding a degree in mechanical engineering, Enrique has cultivated a deep understanding of tool design, mechanics, and the intricacies of various hardware applications. His educational foundation empowers him to innovate and refine tools that enhance efficiency and effectiveness in a wide range of industries.
Professional Focus:
Enrique’s professional focus encompasses a diverse array of areas within the hardware tools sector, including:
- Tool Design and Development: Leveraging his engineering expertise, Enrique specializes in designing tools that meet specific user needs, ensuring optimal performance and durability.
- Material Science: Understanding the properties of various materials allows him to recommend the best tools for specific applications, enhancing safety and efficiency.
- Ergonomics: He emphasizes the importance of ergonomic design in tools, striving to create solutions that reduce user fatigue and improve comfort during prolonged use.
- Sustainability: Enrique is committed to promoting environmentally friendly practices in tool manufacturing, advocating for the use of sustainable materials and processes.
- Education and Training: Through workshops, seminars, and written content, he focuses on educating both professionals and DIY enthusiasts about tool selection, maintenance, and safe usage practices.
Throughout his career, Enrique has worked on numerous projects, collaborating with manufacturers and craftsmen to develop cutting-edge hardware solutions. His expertise spans from traditional hand tools to advanced power tools, allowing him to contribute significantly to both professional and DIY communities.
As an author, Enrique shares his insights through articles, guides, and tutorials, aimed at helping enthusiasts and professionals alike navigate the complexities of hardware tools. His passion for education and practical application drives him to continually explore new technologies and methodologies, making him a trusted voice in the hardware industry.
Whether he’s writing about the latest tool advancements or providing practical tips for tool maintenance, Enrique Howard is dedicated to empowering others with the knowledge and skills necessary to excel in their hardware endeavors.