
Understanding how to ohm a compressor is essential for anyone working in the field of refrigeration and air conditioning.
Compressors are critical components in these systems, responsible for circulating refrigerant and maintaining the cooling cycle. Properly measuring the resistance of a compressor can help diagnose potential issues, ensuring efficient operation and extending the life of the equipment. This guide will walk you through the steps needed to accurately ohm a compressor, enabling you to identify problems and perform necessary repairs with confidence.
What Does It Mean to ‘Ohm’ a Compressor?
To ‘ohm’ a compressor refers to the process of measuring its electrical resistance using an ohmmeter. This measurement is crucial for determining the health of the compressor’s winding coils, which are essential for its operation.
By checking the resistance, technicians can identify whether the compressor is shorted, grounded, or open, which can prevent further damage to the system. Understanding these resistance values is vital for troubleshooting electrical issues and ensuring that the compressor operates efficiently within the refrigeration or air conditioning system.
When to Ohm a Compressor
Knowing when to ohm a compressor is critical for effective maintenance and troubleshooting. It is advisable to measure the electrical resistance whenever you experience symptoms of compressor malfunction, such as unusual noises, decreased cooling efficiency, or if the compressor fails to start.
Additionally, performing this measurement after any significant repairs or component replacements can ensure that everything is functioning properly. Regular preventative maintenance checks, especially in older systems, can also help spot potential issues early, allowing for timely intervention and reducing the risk of complete system failure.
10 Methods How to Ohm a Compressor
1. Gather the Necessary Tools

Before beginning the process of ohming a compressor, gather the necessary tools. You will need a digital multimeter with an ohms setting, insulated gloves for safety, and possibly a set of screwdrivers to access the compressor terminals.
Ensure your multimeter is functioning correctly, and its batteries are fully charged. Having the right tools at hand not only makes the process smoother but also ensures accurate readings, which are essential for diagnosing the compressor’s condition.
2. Power Down the System
Safety is paramount when working with electrical components, so the first step in the actual process is to power down the system.
Turn off the power supply to the compressor by switching off the circuit breaker or disconnecting the power source. Verify that the power is indeed off by using your multimeter to check for voltage at the compressor terminals. Ensuring that the system is de-energized protects you from electrical shock and prevents damage to your multimeter during the testing process.
3. Access the Compressor Terminals
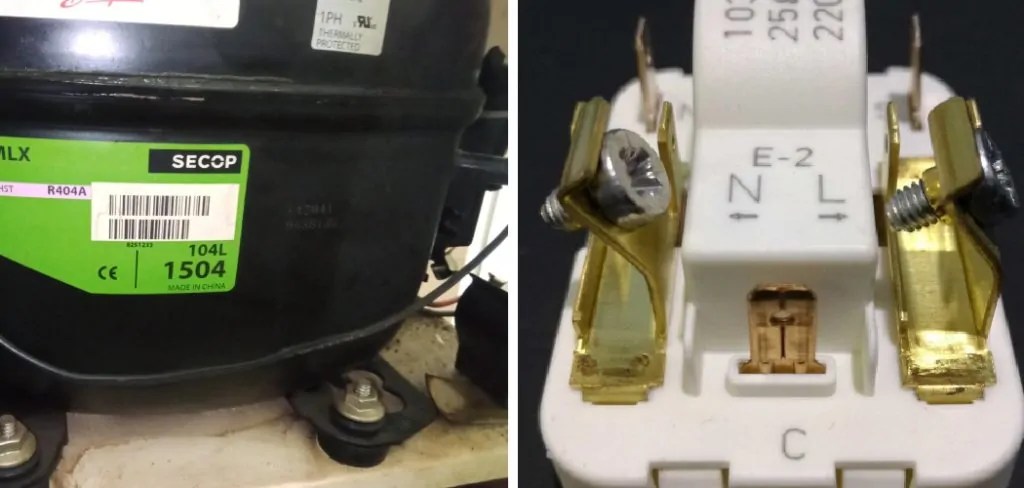
To ohm the compressor, you need to access its electrical terminals. Remove any covers or panels that shield the compressor terminals, typically located at the side or top of the compressor unit.
These terminals are usually labeled C (Common), R (Run), and S (Start). Carefully note the labels and their corresponding wires to avoid confusion during the testing process. Properly accessing the terminals is critical for accurate testing and ensures that you can correctly identify the winding connections.
4. Set Your Multimeter to the Ohms Setting
With the compressor terminals exposed, set your digital multimeter to the ohms (Ω) setting. Most multimeters have a range of resistance settings, so select the lowest range to start, typically around 200 ohms. This allows you to measure small resistances accurately, which is crucial when testing the compressor windings. Ensuring your multimeter is correctly set to measure resistance is essential for obtaining reliable readings.
5. Test the Common to Start (C-S) Resistance
Begin by testing the resistance between the Common (C) and Start (S) terminals. Place one of the multimeter’s probes on the Common terminal and the other on the Start terminal. The resistance reading you obtain will typically be the highest among the three possible combinations (C-S, C-R, and R-S).

A normal reading might range between 5 to 30 ohms, depending on the compressor model. If the resistance is too high or shows as an open circuit, the start winding may be damaged. This test helps you assess the condition of the start winding and diagnose potential issues.
6. Test the Common to Run (C-R) Resistance
Next, test the resistance between the Common (C) and Run (R) terminals. Place the multimeter probes on these terminals and note the reading. The C-R resistance should be lower than the C-S resistance but higher than the R-S resistance. Typically, this reading falls between 1 to 10 ohms. A significantly higher or lower reading could indicate a problem with the run winding, such as a short or open circuit. Testing C-R resistance is crucial for evaluating the run winding, which plays a key role in the compressor’s operation.
7. Test the Run to Start (R-S) Resistance
Finally, test the resistance between the Run (R) and Start (S) terminals. Place the multimeter probes on these terminals and record the reading. The R-S resistance should be the sum of the C-R and C-S resistances, as it represents the total resistance across both windings. If the R-S resistance does not match the sum of the other two readings, it may indicate a problem, such as a partial winding failure. This test confirms the overall integrity of the compressor windings and ensures that they are functioning correctly.
8. Check for Continuity to Ground
In addition to testing the windings, it’s important to check for continuity between each terminal (C, R, S) and the compressor’s casing (ground). Set your multimeter to the continuity or lowest resistance setting and test between each terminal and the compressor housing.

Ideally, there should be no continuity (infinite resistance), indicating that the windings are not shorted to the ground. If you detect continuity, the compressor may have a short to ground, which is a serious issue that usually requires compressor replacement. This step is crucial for ensuring the safety and electrical isolation of the compressor.
9. Interpret the Results
After completing the resistance and continuity tests, interpret the results to diagnose the compressor’s condition. Compare your readings to the manufacturer’s specifications, which can often be found in the service manual or online. Normal readings indicate that the compressor windings are likely in good condition.
However, abnormal readings, such as extremely high resistance, open circuits, or shorts to ground, indicate issues like winding damage, which may require repair or replacement of the compressor. Accurate interpretation of the results is key to determining the next steps in troubleshooting or repairing the system.
10. Document and Take Action
Finally, document all your readings and observations. Record the resistance values for each test and any issues you encountered, such as unusual readings or signs of wear. This documentation is useful for future reference, particularly if further issues arise with the compressor. Based on your findings, take the appropriate action, whether it’s repairing the compressor, replacing it, or continuing to troubleshoot the HVAC system. Proper documentation and action help ensure that any issues with the compressor are addressed promptly and effectively.
Maintenance and Upkeep
Regular maintenance of your compressor is essential to ensure its longevity and optimal performance. Start by keeping the compressor clean and free of debris. Dust, dirt, and grime can hinder airflow and cooling efficiency, so routinely inspect the unit and clean it as needed. Additionally, check for any signs of leaks or corrosion around the compressor and associated piping, as early detection can prevent more serious problems down the line.
It’s also crucial to monitor the compressor’s operating conditions, such as temperature and noise levels. Unusual vibrations or sounds can indicate underlying issues that may require immediate attention.

Schedule regular professional inspections to evaluate the system comprehensively, addressing any wear and tear promptly. Finally, ensure that the electrical connections and components are secure; loose connections can lead to performance issues or safety hazards. By adhering to these maintenance practices, you can maximize the lifespan and efficiency of your compressor while maintaining a well-functioning HVAC system.
Common Mistakes to Avoid
When working with compressors and conducting resistance tests, it’s essential to be aware of common pitfalls that can lead to inaccurate results or further complications. One frequent mistake is failing to properly calibrate the multimeter before use; ensure your device is set to the correct measurement mode to avoid erroneous readings. Additionally, neglecting to disconnect power to the compressor prior to testing can pose safety risks and damage the multimeter.
Another common error is overlooking the importance of referencing the manufacturer’s specifications; each compressor model may have different resistance values and acceptable ranges, so consulting the service manual is crucial. Also, inexperienced technicians might misidentify terminals, resulting in incorrect tests and potential misdiagnosis of issues.
Conclusion
In conclusion, understanding how to test and maintain a compressor is vital for anyone involved in HVAC systems. By conducting thorough resistance and continuity tests, you can accurately diagnose the condition of compressor windings, ensuring the system operates efficiently and safely.
Regular upkeep, including cleaning, monitoring, and professional inspections, further prolongs the compressor’s lifespan and optimizes its performance. Hopefully, this article gave you some helpful tips about how to ohm a compressor successfully, so now that you have the proper knowledge on how to get the job done, why not give it a try today?
Occupation: Expert in Hardware Tools
Education: Bachelor’s Degree in Mechanical Engineering
Profile:
Enrique Howard is a seasoned expert in the field of hardware tools, with a robust background in mechanical engineering that underpins his extensive knowledge and skills. Holding a degree in mechanical engineering, Enrique has cultivated a deep understanding of tool design, mechanics, and the intricacies of various hardware applications. His educational foundation empowers him to innovate and refine tools that enhance efficiency and effectiveness in a wide range of industries.
Professional Focus:
Enrique’s professional focus encompasses a diverse array of areas within the hardware tools sector, including:
- Tool Design and Development: Leveraging his engineering expertise, Enrique specializes in designing tools that meet specific user needs, ensuring optimal performance and durability.
- Material Science: Understanding the properties of various materials allows him to recommend the best tools for specific applications, enhancing safety and efficiency.
- Ergonomics: He emphasizes the importance of ergonomic design in tools, striving to create solutions that reduce user fatigue and improve comfort during prolonged use.
- Sustainability: Enrique is committed to promoting environmentally friendly practices in tool manufacturing, advocating for the use of sustainable materials and processes.
- Education and Training: Through workshops, seminars, and written content, he focuses on educating both professionals and DIY enthusiasts about tool selection, maintenance, and safe usage practices.
Throughout his career, Enrique has worked on numerous projects, collaborating with manufacturers and craftsmen to develop cutting-edge hardware solutions. His expertise spans from traditional hand tools to advanced power tools, allowing him to contribute significantly to both professional and DIY communities.
As an author, Enrique shares his insights through articles, guides, and tutorials, aimed at helping enthusiasts and professionals alike navigate the complexities of hardware tools. His passion for education and practical application drives him to continually explore new technologies and methodologies, making him a trusted voice in the hardware industry.
Whether he’s writing about the latest tool advancements or providing practical tips for tool maintenance, Enrique Howard is dedicated to empowering others with the knowledge and skills necessary to excel in their hardware endeavors.