
Are you new to soldering or want to improve your technique? How to hold a soldering iron correctly is crucial for achieving clean and precise solder joints. I
Proper technique in holding and using a soldering iron is crucial when working with electronic components to ensure both safety and efficiency. A soldering iron is a pen-like instrument used to apply heat to metals so that solder can melt to form a connection between electronic parts. Whether you’re a beginner or an experienced technician, correctly handling a soldering iron is essential to avoid accidents and achieve reliable results.
This guide explore the best practices for holding a soldering iron, giving you the confidence to tackle your soldering projects with precision and care.
What Will You Need?
Before we dive into the techniques of how to hold a soldering iron, let’s first gather the necessary tools for this task. You will need:
- A soldering iron
- Solder (preferably lead-free)
- A heat-resistant work surface or mat
- Protective eyewear and gloves (optional but highly recommended)
- A wet sponge or brass wool for tip cleaning
Having all these items within reach before starting your soldering project will make the process smoother and safer.
10 Easy Steps on How to Hold a Soldering Iron
Step 1. Prepare Your Work Area
To ensure a safe and efficient soldering experience, setting up your work area properly is important. Begin by choosing a well-ventilated space to avoid inhaling fumes. Proper ventilation is crucial because soldering can emit smoke and fumes containing harmful substances. A workbench with ample space for your tools and components is essential. Ensure that your work surface is stable and heat-resistant, as high temperatures pose a risk of damage or fire.

It’s also advisable to keep flammable substances away from the soldering area. Organize your tools and components neatly around your work area for easy access. Additionally, always have a safety plan in place, including knowing the location of the nearest fire extinguisher or emergency equipment. Preparing your work area effectively will create a safer and more efficient environment for your soldering projects.
Step 2. Heat Up the Soldering Iron
Once your work area is set up, plug in your soldering iron and allow it to heat up. The time it takes to reach the optimal temperature will depend on the specific model, but typically, it only takes a few minutes. It’s essential to wait until the soldering iron is fully heated to ensure proper soldering and avoid cold solder joints, which are ineffective and unreliable. Most modern soldering irons have a built-in indicator light that turns on when the iron is heating and off or changes color when the desired temperature is reached.
Be sure to place the soldering iron in its stand while it heats to prevent accidental burns or fire hazards. Meanwhile, you can use this time to prepare your components and solder, ensuring everything is ready for a smooth operation once the iron is hot.
Step 3. Clean the Soldering Iron Tip

Once the soldering iron reaches the desired temperature, cleaning the tip before you begin soldering is crucial. A clean tip ensures better thermal conductivity and prevents oxidation, which can impair the quality of your solder joints. To gently clean the tip, use a damp sponge or brass wool to wipe away any old solder or debris. After cleaning, you might notice a shiny, metallic surface on the tip, indicating that it is ready for use. Regular cleaning of the soldering iron tip throughout your session will maintain its efficiency and prolong its life, leading to superior performance and results.
Step 4. Tin the Soldering Iron Tip
Tinning the tip of your soldering iron is a vital step that helps facilitate efficient heat transfer and extends the tip’s life. To tin the soldering iron, apply a small amount of solder to the tip after cleaning it. The solder should melt and cover the tip with a thin, shiny coat, forming a protective layer that prevents oxidation. This process also improves the thermal conductivity of the tip, ensuring that it efficiently heats the components you’re working on. Remember to tin the tip periodically during your soldering session, particularly if you notice it is becoming dull or discolored, to maintain optimal performance and produce quality solder joints.
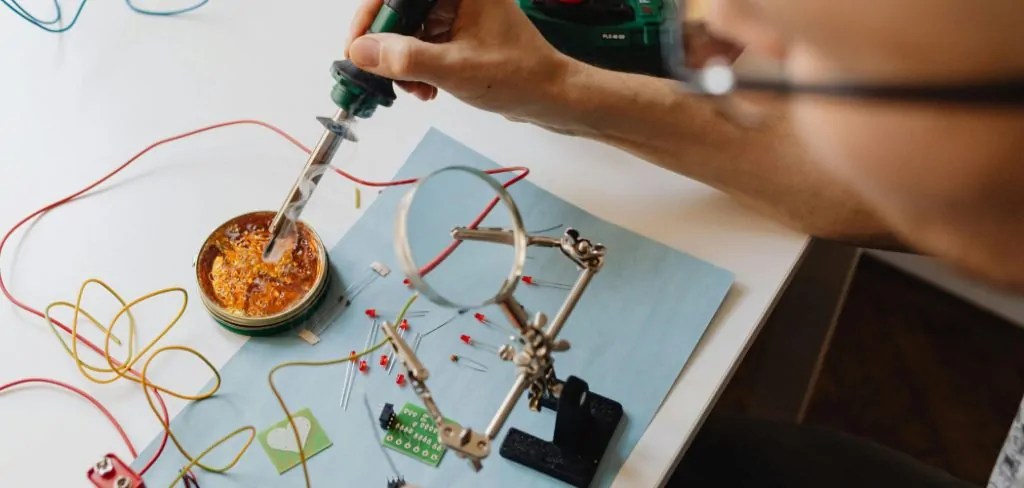
Step 5. Hold the Soldering Iron Properly
Proper grip and handling are essential for precise and safe soldering. Hold the soldering iron like a pencil, ensuring a firm yet comfortable grip. The distance from your hand to the hot tip should be minimal but sufficient to avoid heat conduction to your fingers. This technique allows for better control over the soldering iron, aiding in accuracy. Be mindful of your posture, keeping your wrist and hand steady while soldering. Holding the soldering iron correctly prevents strain and helps achieve consistent solder joints without fatigue, contributing to more effective and satisfying soldering outcomes.
Step 6. Apply Solder to the Joint

With the soldering iron appropriately held, it’s time to apply solder to the joint. Position the soldering iron’s heated tip to touch the component lead and the metal pad on the circuit board simultaneously. This ensures that both parts are heated equally. Feed solder into the joint, not the soldering iron tip, to allow capillary action to draw the molten solder into the joint.
Apply just enough solder to cover the joint with a thin, even layer, ensuring a shiny and smooth finish. A proper amount of solder is crucial to avoid creating a weak or unreliable connection, as too little solder may fail to adhere fully. At the same time, too much can build bridges between connected joints, leading to shorts. Once the solder has flowed and covered the joint, remove the soldering iron and allow the joint to cool naturally for a few seconds before proceeding to the next component.
Step 7. Inspect the Solder Joint
After soldering a connection, inspecting the solder joint to ensure it is well-formed and reliable. A good solder joint will appear smooth, shiny, and shaped like a small cone, without any gaps or sharp points. Check for solder bridges and unintended connections between closely spaced joints that could cause short circuits. Ensure there is no excess solder or signs of cold solder joints, such as a dull or frosted appearance, indicating insufficient heat. If you detect any issues, reapply heat with the soldering iron while properly heating the joint to reshape and solidify the connection.
Step 8. Clean Up the Work Area
After completing your soldering project, it’s essential to properly clean up your work area to maintain safety and organization for future tasks. Begin by turning off and unplugging your soldering iron, allowing it to cool safely in its stand. Dispose of excess solder, wire clippings, or disposable items in the appropriate waste receptacles. Return tools and components to their designated storage spaces, ensuring they are organized and ready for use next time. Clean your work surface to remove any flux residue or debris accumulated during soldering. Taking the time to tidy up ensures a neat work environment and prolongs the lifespan of your tools and equipment, making subsequent projects more efficient.
Step 9. Store Your Soldering Equipment Safely

Once your work area is clean, storing your soldering equipment safely is essential to prevent damage and ensure longevity. Start by ensuring that all soldering tools, including the soldering iron, tips, and stand, are completely cooled down. Store the soldering iron and its accessories in a dry, dust-free environment, preferably in a case or drawer designed for electronics work. To prevent oxidation or contamination, keep solder, desoldering tools, and other consumables in airtight containers. Organizing your equipment correctly helps maintain its condition and makes it easier to set up quickly for your next soldering project. A neatly arranged and accessible storage system promotes a more efficient workflow and enhances safety by minimizing the risk of misplaced hot tools.
Step 10. Test the Soldered Connections
After completing the soldering process and cleaning up your work area, testing the soldered connections is crucial to ensure your project functions as intended. Begin by visually inspecting each joint once more to verify its integrity. Then, use a multimeter to check for continuity across the soldered paths, ensuring the electrical connections are complete without unintended shorts. If your project involves electronic components, power it slowly, monitoring for proper functionality and any signs of issues, such as heat or odd noises. This testing phase should be completed on time, as it is essential to catch any potential problems before they become more extensive.
By following these steps and practicing proper soldering techniques, you can confidently produce quality solder joints and complete your projects.
Conclusion:
How to hold a soldering iron properly is fundamental to achieving precision and safety in soldering tasks.
By adopting the correct grip, akin to holding a pencil, you ensure control and comfort, minimizing the risk of accidental burns or misalignment. Maintaining a steady posture and controlling the distance between your hand and the soldering iron tip not only aids in delivering accurate solder joints but also prevents fatigue, allowing for extended soldering sessions without strain.
As you become more accustomed to this technique, your efficiency and the quality of your work will significantly improve, reinforcing the importance of mastering this essential yet crucial skill in soldering.
Occupation: Expert in Hardware Tools
Education: Bachelor’s Degree in Mechanical Engineering
Profile:
Enrique Howard is a seasoned expert in the field of hardware tools, with a robust background in mechanical engineering that underpins his extensive knowledge and skills. Holding a degree in mechanical engineering, Enrique has cultivated a deep understanding of tool design, mechanics, and the intricacies of various hardware applications. His educational foundation empowers him to innovate and refine tools that enhance efficiency and effectiveness in a wide range of industries.
Professional Focus:
Enrique’s professional focus encompasses a diverse array of areas within the hardware tools sector, including:
- Tool Design and Development: Leveraging his engineering expertise, Enrique specializes in designing tools that meet specific user needs, ensuring optimal performance and durability.
- Material Science: Understanding the properties of various materials allows him to recommend the best tools for specific applications, enhancing safety and efficiency.
- Ergonomics: He emphasizes the importance of ergonomic design in tools, striving to create solutions that reduce user fatigue and improve comfort during prolonged use.
- Sustainability: Enrique is committed to promoting environmentally friendly practices in tool manufacturing, advocating for the use of sustainable materials and processes.
- Education and Training: Through workshops, seminars, and written content, he focuses on educating both professionals and DIY enthusiasts about tool selection, maintenance, and safe usage practices.
Throughout his career, Enrique has worked on numerous projects, collaborating with manufacturers and craftsmen to develop cutting-edge hardware solutions. His expertise spans from traditional hand tools to advanced power tools, allowing him to contribute significantly to both professional and DIY communities.
As an author, Enrique shares his insights through articles, guides, and tutorials, aimed at helping enthusiasts and professionals alike navigate the complexities of hardware tools. His passion for education and practical application drives him to continually explore new technologies and methodologies, making him a trusted voice in the hardware industry.
Whether he’s writing about the latest tool advancements or providing practical tips for tool maintenance, Enrique Howard is dedicated to empowering others with the knowledge and skills necessary to excel in their hardware endeavors.