
Maintaining a pristine lawn can be a satisfying endeavour, and one of the most coveted techniques for achieving that is creating distinct lines in the grass. Using a push mower not only promotes exercise and personal satisfaction but also offers greater control over your mowing patterns.

In this guide, we will explore how to get lines in grass with push mower, enhancing both the aesthetics and health of your lawn. Whether you’re preparing for a summer barbeque or simply want to impress your neighbours, mastering this technique can elevate your lawn care game to the next level.
What Is Lawn Striping ?
Lawn striping is the practice of mowing grass in alternating patterns to create visible stripes or lines across the lawn. This visually appealing technique is achieved by adjusting the direction in which you mow, causing the grass blades to bend in different directions. As light hits the grass at varying angles, the contrasting colours created by the light reflections give the illusion of stripes. Lawn striping not only enhances the aesthetic appeal of your yard but also promotes a healthier lawn by encouraging grass growth in a uniform manner.
The Science Behind Lawn Striping
Lawn striping relies on the simple principles of light and grass physiology. When you mow in different directions, the angle at which the grass blades are bent changes, affecting how light is reflected off their surfaces. Grass blades that are bent towards the observer appear darker, while those bent away seem lighter. This difference creates the striking contrast that forms the visible stripes in the lawn. Additionally, mowing in a systematic pattern encourages even growth across the lawn, allowing for better air circulation and sunlight penetration, which fosters a denser and healthier turf.
10 Methods How to Get Lines in Grass with Push Mower
1. Mow in Straight Lines

The key to getting straight, professional-looking lines is starting with straight mowing paths. Choose a fixed reference point, such as a tree, fence post, or driveway, and keep your eyes on it as you mow. Avoid looking down at the mower, as this can cause you to drift. Walk in a straight line toward your reference point, keeping your speed consistent. To create sharp, well-defined lines, make each mowing path directly next to the previous one without overlapping. Straight lines form the foundation for creating a professional striped effect on your lawn.
2. Alternate Mowing Directions
Alternating the direction in which you mow with each pass is essential to creating stripes. The blades of grass will bend in the direction you mow, and this is what creates the visual effect of stripes. Mowing in one direction bends the grass one way, and mowing in the opposite direction on the next pass bends the grass the other way, causing the alternating light and dark patterns. If your last pass was from north to south, mow the next pass from south to north. This method ensures that your grass blades bend evenly, creating clean and uniform stripes.
3. Lower the Mower Deck
The height of your grass plays a significant role in how visible your stripes are. A longer blade of grass will bend more easily and reflect more light, making the stripes more pronounced. Lowering your mower deck to a medium height can help you achieve this effect. Avoid cutting the grass too short, as shorter blades won’t bend as easily, making the stripes less visible. A good rule of thumb is to mow at a height of around 2.5 to 3 inches, which is ideal for creating well-defined stripes while keeping your grass healthy.
4. Use a Striping Kit or Roller
While a push mower alone can create lines in your grass, using a striping kit or roller can significantly enhance the effect. These tools attach to the back of your mower and help to bend the grass more effectively by applying pressure after the blades cut the grass. You can purchase a striping kit or make one yourself by attaching a weighted bar or homemade roller to the back of your push mower. The added weight ensures the grass bends uniformly, creating more pronounced stripes and giving your lawn a professionally manicured look.
5. Overlap Slightly with Each Pass
When mowing each stripe, be sure to overlap slightly with the previous pass. This overlap helps ensure that no grass is missed and that the lines between stripes are clean and distinct. A small overlap, typically the width of one wheel of your mower, is sufficient. Overlapping also prevents any uncut patches of grass from interrupting the striped pattern. Consistency is key when creating stripes, so keep your overlap uniform as you move across the lawn to maintain the overall appearance of the pattern.
6. Plan Your Pattern Ahead of Time

To create a professional-looking striped lawn, it’s helpful to plan your pattern before you start mowing. Common patterns include simple stripes, checkerboards, and diagonal patterns. For beginners, straight parallel stripes are the easiest to execute. Once you’re comfortable, you can experiment with more complex designs like crisscross or circular stripes. Planning ahead ensures that you mow with purpose and avoid random or crooked lines that detract from the overall look. Visualizing your pattern before mowing will also help you achieve uniform stripes across the entire lawn.
7. Mow in the Same Direction Each Time
When mowing each row, ensure that you mow in the same direction on both sides of the lawn. This technique helps maintain consistency in how the grass bends, giving a more cohesive look to your stripes. For example, if you begin mowing from the left side of your lawn, mow all rows on that side in the same direction. Then, when you reach the other side, repeat the process in reverse. This method ensures that your stripes are even and avoids the appearance of random or mismatched lines.
8. Avoid Sharp Turns
When you reach the end of a mowing row, turn your mower carefully to avoid disrupting the stripe. Sharp, jerky turns can cause uneven bends in the grass, which will create unsightly patches or irregular lines. Instead, use wide, gentle turns when transitioning from one row to the next. A smooth turnaround ensures that the grass bends uniformly, maintaining the clean lines you’ve worked to create. After completing a row, gently lift the mower and turn in the opposite direction, then continue your next row in a straight line.
9. Mow When the Grass is Dry
For the best results, mow your lawn when the grass is dry. Wet grass tends to clump together and may not bend as easily, which can make it difficult to achieve defined stripes. Dry grass is more likely to stand up straight after being mowed, and the blades will bend more consistently when you run your push mower over them. Mowing when the grass is dry also helps to prevent clogs in your mower and ensures an even cut, contributing to the overall appearance of your stripes.
10. Maintain Sharp Mower Blades

Dull mower blades can tear grass instead of cutting it cleanly, which not only damages the grass but also makes it more difficult to achieve clean, well-defined stripes. Regularly sharpening your mower blades ensures a crisp, even cut, which in turn helps the grass blades bend properly and reflect light as intended. Sharpening your blades at the beginning of the mowing season and periodically throughout the year will improve the overall health of your lawn while enhancing the striping effect.
Things to Consider When Creating Stripes in Your Lawn
- Grass Type: Different grass types have varying growth patterns and blade stiffness, which can impact how well they hold stripes. Cool-season grasses, such as Kentucky bluegrass and tall fescue, often exhibit more pronounced striping effects compared to warm-season grasses. Understanding your grass type will help you determine the best mowing techniques to achieve the desired results.
- Weather Conditions: Weather plays a crucial role in the striping process. Mowing during dry, mild conditions is ideal, as grass tends to hold its shape better and reduces the risk of clumping. Additionally, avoid mowing during extremes of heat or cold, as these conditions can stress the grass and lead to uneven stripes.
- Mower Weight and Type: The weight and type of mower can influence your ability to create defined stripes. Heavier mowers or those equipped with striping kits are more effective for bending grass blades uniformly. If you use a lightweight push mower, consider the impact of its design on the final appearance of your lawn patterns.
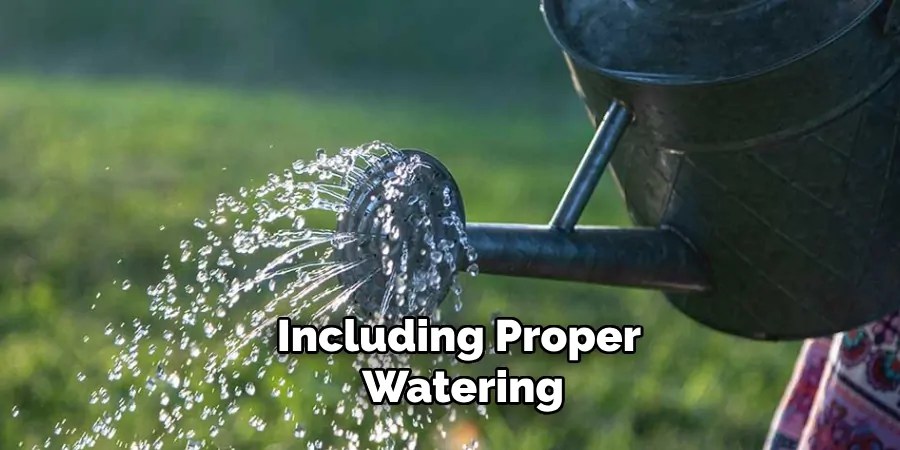
- Lawn Maintenance Practices: Regular lawn maintenance, including proper watering, fertilising, and pest control, contributes to the overall health and appearance of your lawn. A well-maintained lawn is more capable of producing sharp and vibrant stripes. Additionally, keeping up with lawn care routines will enhance recovery from mowing, making the stripes more resilient and long-lasting.
Conclusion
Creating lines in your grass with a push mower may seem like a challenge, but with the right techniques and a little practice, you can achieve a beautifully striped lawn. By mowing in straight lines, alternating directions, and using tools like striping kits, you can create professional-looking stripes that elevate the appearance of your yard. Thanks for reading, and we hope this has given you some inspiration on how to get lines in grass with push mower!
Occupation: Expert in Hardware Tools
Education: Bachelor’s Degree in Mechanical Engineering
Profile:
Enrique Howard is a seasoned expert in the field of hardware tools, with a robust background in mechanical engineering that underpins his extensive knowledge and skills. Holding a degree in mechanical engineering, Enrique has cultivated a deep understanding of tool design, mechanics, and the intricacies of various hardware applications. His educational foundation empowers him to innovate and refine tools that enhance efficiency and effectiveness in a wide range of industries.
Professional Focus:
Enrique’s professional focus encompasses a diverse array of areas within the hardware tools sector, including:
- Tool Design and Development: Leveraging his engineering expertise, Enrique specializes in designing tools that meet specific user needs, ensuring optimal performance and durability.
- Material Science: Understanding the properties of various materials allows him to recommend the best tools for specific applications, enhancing safety and efficiency.
- Ergonomics: He emphasizes the importance of ergonomic design in tools, striving to create solutions that reduce user fatigue and improve comfort during prolonged use.
- Sustainability: Enrique is committed to promoting environmentally friendly practices in tool manufacturing, advocating for the use of sustainable materials and processes.
- Education and Training: Through workshops, seminars, and written content, he focuses on educating both professionals and DIY enthusiasts about tool selection, maintenance, and safe usage practices.
Throughout his career, Enrique has worked on numerous projects, collaborating with manufacturers and craftsmen to develop cutting-edge hardware solutions. His expertise spans from traditional hand tools to advanced power tools, allowing him to contribute significantly to both professional and DIY communities.
As an author, Enrique shares his insights through articles, guides, and tutorials, aimed at helping enthusiasts and professionals alike navigate the complexities of hardware tools. His passion for education and practical application drives him to continually explore new technologies and methodologies, making him a trusted voice in the hardware industry.
Whether he’s writing about the latest tool advancements or providing practical tips for tool maintenance, Enrique Howard is dedicated to empowering others with the knowledge and skills necessary to excel in their hardware endeavors.