
Have you ever tried to install a cabinet hinge only to realize that the holes don’t line up perfectly? It can be incredibly frustrating, especially when you’re just trying to upgrade your kitchen cabinets or get them back in working order. Fortunately, there’s an easy solution: drilling new hinging holes.

In this article, we’ll cover all the steps needed how to drill cabinet hinge holes so that you can have perfect alignment and secure mounting every time. So grab your power drill and let’s get started!
Tools and Materials You Will Need to Drill Cabinet Hinge Holes
- Power drill with a variety of bits
- A template or ruler to measure hole placement
- Pencil or marker for marking the holes
- Cabinet hinges
- Wood screws
- Safety glasses (always wear protective eyewear when working with power tools)
Step by Step Guidelines on How to Drill Cabinet Hinge Holes
Step 1: Measure and Mark Your Cabinet Hinge Holes
Before you start drilling, it’s important that you take the time to measure and mark your cabinet hinge holes. Using a ruler or template, measure out the exact placement of where the hinges should go on each door. Use a pencil or marker to label each hole and double-check that everything is aligned properly before proceeding.
Step 2: Select the Right Bit Size for Your Cabinet Hinge Holes
Now that everything is marked, it’s time to select the right bit size for your cabinet hinge hole. The drill bit should be slightly larger than the screws you plan on using so that it creates a tight, secure fit. Take your time and make sure you have the correct size bit before drilling. This will ensure that the hinge holes are properly sized and won’t need to be redone.
Step 3: Drill Cabinet Hinge Holes

Once you have the correct drill bit, it’s time to start drilling! Make sure to wear protective eyewear and take your time when drilling into the marked holes. Be careful not to apply too much pressure or you risk cracking or splitting the wood. As you drill, make sure that the bit is going in straight to ensure that your hinge holes will be aligned correctly.
Step 4: Install Cabinet Hinges
Once you’ve finished drilling all of your cabinet hinge holes, it’s time to install the hinges. Place each hinge into its respective hole and secure it with wood screws. Make sure everything is properly installed before moving on to the next hinge. Installing hinges can be tricky, so take your time and make sure everything is tight before moving on.
And that’s it! You’re all done drilling cabinet hinge holes! With a little bit of patience and the right tools, you now have a perfect alignment for all of your cabinets. As always, safety should come first when working with power tools; so make sure to follow all the necessary safety precautions and you’ll be good to go! Good luck and happy drilling!
Additional Tips and Tricks to Drill Cabinet Hinge Holes
1. To help ensure accuracy, make a simple jig by attaching a piece of plywood to the cabinet door using double-sided tape or clamps. Drill the holes through the plywood first, and then use these drill holes as templates for drilling into the cabinet door itself.
2. If possible, paint all sides of the cabinet doors before drilling the hinge holes. This will make it easier to cover any potential drill holes or chips in case of a mistake.
3. Use a high-quality power drill and drill bits for best results, as these will be more accurate and powerful than manual drills and drill bits. It’s also important to use the correct size of bit for the particular hinge you are using.
4. If possible, use a drill press instead of a power drill. This will help reduce any minor inaccuracies in drilling and make sure the holes are drilled cleanly and accurately.
5. For extra precision, try using a center punch before drilling. This will create an indentation for the drill bit to rest on, helping it stay on track and ensuring a cleaner hole.
6. If you are using a power drill, make sure to use a slower speed setting when drilling holes in hardwoods or other dense materials. A slower speed will reduce friction and heat buildup that can cause the bit to melt, deform, or break.

7. Always wear safety glasses when drilling into hardwoods or any other materials. Drilling can sometimes create splinters and flying debris that can cause eye injury if not properly protected.
8. Make sure to thoroughly clean the cabinet door before drilling the hinge holes. This will help prevent dirt, dust, and other particles from clogging or damaging the drill bit or getting into the newly drilled hole.
9. After drilling the hinge holes, use a countersink bit to create recesses for the screws. This will help keep the screw heads flush with the cabinet door and make sure they won’t protrude.
10. Take your time when drilling into hardwoods or any other material; rushing can result in inaccurate holes, unnecessary damage to the wood, or (worse) injury to yourself.
Following these tips and tricks can help ensure that the hinge holes you make are as precise and accurate as possible. With patience and practice, it’s easy to become a pro at drilling cabinet hinge holes!
Things You Should Consider to Drill Cabinet Hinge Holes
1. Determine the type of hinge you will be using. Most cabinet hinges are either “face frame” or “frameless.” Face frame hinges are mounted to the outer edges of the cabinets, while frameless hinges are mounted on the door itself. Knowing what type of hinge you will use is important for determining where to drill a hole and how deep it needs to be.
2. Measure the exact location of the hinge on the door or frame where you will need to drill. Using a carpenter’s square and a pencil, mark out exactly where you are going to need to make your hole. This will ensure that all of your hinges line up perfectly with one another when they are installed.
3. Always use a drill bit that is the correct size for your hinges. If you use a bit that is too large, it may cause the hinge to become loose over time and could create an uneven gap between the door and frame.
4. To ensure a smooth finish, always lubricate the drill bit before drilling into the wood. This will reduce friction which can make it difficult to get a clean hole.

5. Finally, always make sure that you have clamps in place to hold the door or frame steady before drilling. This will help ensure accuracy and reduce the chance of splitting the wood when making your holes. Once you are done drilling, remove the clamps and finish off any rough edges with sandpaper.
By following these considerations, you’ll be able to drill perfectly aligned cabinet hinge holes in no time. Good luck!
Frequently Asked Questions
What Type of Drill Bit Should I Use?
You should use a Forstner drill bit for drilling hinge holes. These bits can be used in hand-held or benchtop drills and allow for precise cuts that create clean, flat-bottomed holes.
What Size Drill Bit Should I Use?
The size of the drill bit will depend on the size of the hinge you are using. Generally, a 3/16-inch or 1/4-inch Forstner bit should be adequate for most purposes. It is recommended that you purchase multiple sizes to ensure you have the right one for each job.
How Deep Should I Drill?
For most hinges, you will only need to drill approximately 1/2 inch deep. However, some hinges may require deeper holes. In those cases, you should refer to the manufacturer’s instructions for exact measurements.
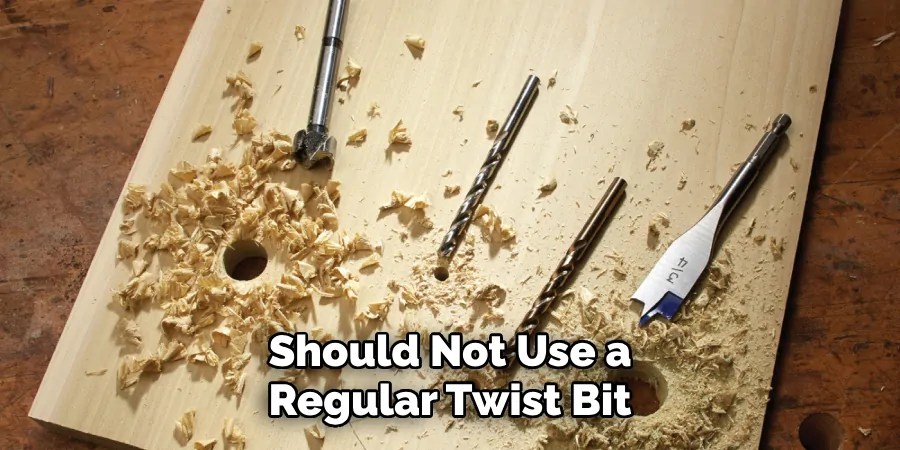
Can I Use a Regular Twist Bit Instead of a Forstner Bit?
No, you should not use a regular twist bit to drill hinge holes. These bits are designed for drilling wood and create rough, jagged edges that can damage the hinges. The Forstner bit is the best choice for this type of job.
Do I Need to Use a Pilot Hole?
Yes, using a pilot hole is recommended when drilling hinge holes. This will help to ensure that your drill bit does not wander and creates a clean, accurate hole. To create a pilot hole, use a smaller drill bit than the one you plan to use for the final hole size. Make sure it is at least 1/8 inch smaller than the desired diameter of your finished hole.
Do I Need Special Tools for Drilling Hinge Holes?
No, you do not necessarily need special tools to drill hinge holes. A hand-held or benchtop drill and a Forstner bit are all that are required. However, if you plan on drilling multiple holes in different locations, it may be beneficial to use a jig to help ensure accuracy.
Conclusion
As you can see, it is fairly simple to drill holes for cabinets and hinges. Once you have the basic steps and knowledge of tools needed down, you will become a master in this area in no time! It may be intimidating at first, but persevere through it and remember that accuracy and the right tools are important factors in successful cabinet hinge installation.
With the help of these tips and tricks on how to drill cabinet hinge holes, any DIY homeowner should be confident taking on this project. Have confidence in your DIY skills—take on this project as if it were an adventure and something you are fully capable of completing! Good luck with your drilling adventures, home improvement warriors!
Occupation: Expert in Hardware Tools
Education: Bachelor’s Degree in Mechanical Engineering
Profile:
Enrique Howard is a seasoned expert in the field of hardware tools, with a robust background in mechanical engineering that underpins his extensive knowledge and skills. Holding a degree in mechanical engineering, Enrique has cultivated a deep understanding of tool design, mechanics, and the intricacies of various hardware applications. His educational foundation empowers him to innovate and refine tools that enhance efficiency and effectiveness in a wide range of industries.
Professional Focus:
Enrique’s professional focus encompasses a diverse array of areas within the hardware tools sector, including:
- Tool Design and Development: Leveraging his engineering expertise, Enrique specializes in designing tools that meet specific user needs, ensuring optimal performance and durability.
- Material Science: Understanding the properties of various materials allows him to recommend the best tools for specific applications, enhancing safety and efficiency.
- Ergonomics: He emphasizes the importance of ergonomic design in tools, striving to create solutions that reduce user fatigue and improve comfort during prolonged use.
- Sustainability: Enrique is committed to promoting environmentally friendly practices in tool manufacturing, advocating for the use of sustainable materials and processes.
- Education and Training: Through workshops, seminars, and written content, he focuses on educating both professionals and DIY enthusiasts about tool selection, maintenance, and safe usage practices.
Throughout his career, Enrique has worked on numerous projects, collaborating with manufacturers and craftsmen to develop cutting-edge hardware solutions. His expertise spans from traditional hand tools to advanced power tools, allowing him to contribute significantly to both professional and DIY communities.
As an author, Enrique shares his insights through articles, guides, and tutorials, aimed at helping enthusiasts and professionals alike navigate the complexities of hardware tools. His passion for education and practical application drives him to continually explore new technologies and methodologies, making him a trusted voice in the hardware industry.
Whether he’s writing about the latest tool advancements or providing practical tips for tool maintenance, Enrique Howard is dedicated to empowering others with the knowledge and skills necessary to excel in their hardware endeavors.