
Are you worried about your generator not starting up properly? The main culprit could be a dirty carburetor. As your generator works, fuel can leave behind varnish, gunk, and debris that can clog up the carburetor and prevent proper fuel flow.

How to clean the carburetor on a generator is a crucial maintenance task that ensures optimal performance and longevity of the machine. Over time, dirt, debris, and fuel deposits can accumulate within the carburetor, leading to inefficient fuel flow and engine performance issues. Regularly maintaining the carburetor helps prevent these problems and enhances the generator’s efficiency, making it ready for use when you need it most.
In this guide, we will walk you through the necessary steps and safety precautions to effectively clean the carburetor, ensuring your generator runs smoothly and reliably. Let’s get started!
What Will You Need?
- A clean, well-ventilated workspace
- Protective gloves and eyewear
- Owner’s manual for your generator
- Carburetor cleaner or a carburetor cleaning kit (with all necessary tools and instructions)
- Clean rags or towels
Once you have gathered all the necessary materials, familiarize yourself with the owner’s manual and carburetor cleaning kit instructions before starting.
10 Easy Steps on How to Clean the Carburetor on a Generator
Step 1: Disconnect the Power Source
Before you begin any maintenance on your generator, it’s essential to disconnect the power source to ensure your safety. This prevents accidental starting and protects you from potential electrical hazards. Start by turning off the generator completely and removing any electrical connections, including unplugging devices that may be connected to its power outlets.
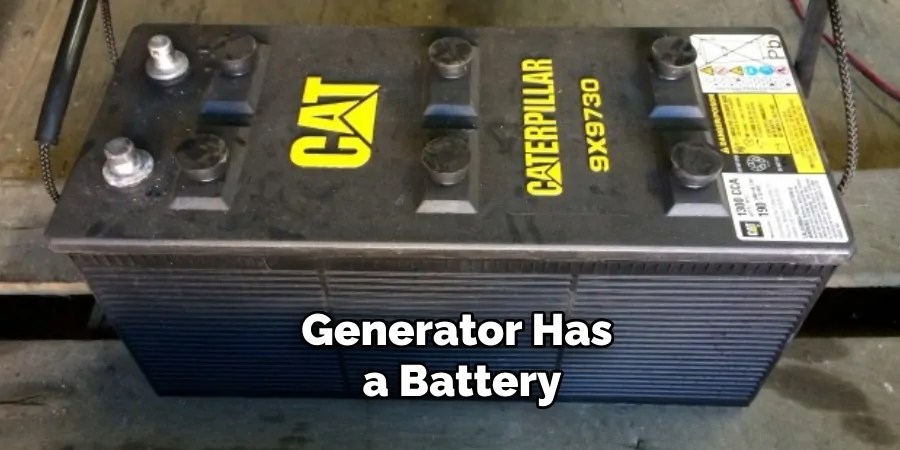
If your generator has a battery, you should also disconnect the battery terminals to eliminate any chance of a power surge while working. Additionally, it’s advisable to place safety signs around the generator to warn others that it is undergoing maintenance. Once you are confident that all power sources have been disconnected and the area is secure, you can proceed to the next steps in cleaning your carburetor.
Step 2: Remove the Carburetor
To begin the removal process, locate the carburetor on your generator; typically, it’s situated near the engine. Carefully inspect the area for any screws, bolts, or clips that secure the carburetor in place. Using the appropriate tools from your cleaning kit, loosen and remove these fasteners.
Be mindful of any fuel lines connected to the carburetor; gently disconnect them to prevent spills, and have a container ready to catch any residual fuel. It’s important to label or take note of where each component is connected, as this will make reinstallation easier. Once all attachments are removed, carefully lift the carburetor away from the engine, not damaging any adjacent parts. Place the carburetor in your clean workspace, ready for the cleaning process.
Step 3: Disassemble the Carburetor
Once the carburetor is safely removed from the generator, the next step is to disassemble it for a thorough cleaning. Begin by identifying the different sections of the carburetor, such as the float bowl, diaphragm, and jets.
Carefully remove the screws or clips securing these parts together using the tools from your cleaning kit. As you disassemble, keep track of each component and take notes or pictures to ensure proper reassembly later. Make sure to handle the components gently to avoid damaging any delicate parts. Once fully disassembled, set the individual pieces aside in an organized manner so you can easily access them during the cleaning process.
Step 4: Clean the Carburetor Components
Now that you have disassembled the carburetor, it’s time to clean each component thoroughly. Start with the float bowl, which often collects debris and fuel deposits. Use carburetor cleaner and a clean rag to wipe away any residues, ensuring you remove any built-up varnish. For the jets, use a small brush or compressed air to clear any blockages. Submerge smaller parts in a carburetor cleaning solution if necessary, allowing them to soak for a few minutes to loosen any stubborn grime. Inspect each component carefully for wear or damage, replacing any parts that show signs of significant wear or corrosion.
Step 5: Reassemble the Carburetor

After all the components have been cleaned and inspected, it’s time to reassemble the carburetor. Begin by carefully assembling the parts, starting with the jets and diaphragm. Ensure that each component fits securely and is oriented correctly, as indicated in your notes or pictures from the disassembly process. Once all parts are reassembled, securely fasten them using the screws or clips you previously removed. Be cautious not to overtighten, as this could strip the threads or damage the components.
Step 6: Reinstall the Carburetor
Once the carburetor is fully reassembled, you can reinstall it back onto the generator. Carefully align the carburetor with the engine, ensuring that any connecting points, such as fuel lines and air intake, are properly positioned. Reconnect the fuel lines, ensuring they are secure to prevent fuel leaks. Use the appropriate screws, bolts, or clips to fasten the carburetor back in place, tightening them evenly to provide a snug fit without overtightening. Double-check that everything is aligned correctly and all connections are secure before proceeding to the next step.
Step 7: Reconnect the Power Source
With the carburetor successfully reinstalled, it’s time to reconnect the power source. If you disconnected a battery or any power leads, carefully reattach them, following the guidelines provided in your generator’s owner’s manual. Ensure all connections are secure and there is no risk of short circuits before powering up the generator. This step is crucial for ensuring that the generator can operate correctly once started.
Step 8: Start the Generator
After ensuring everything is in place, you can start the generator to check if your cleaning efforts have paid off. Turn the generator on following the proper start-up procedure detailed in your owner’s manual. Initially, listen for any unusual noises and observe if the engine is running smoothly. A well-cleaned carburetor will enable the generator to function efficiently, providing steady power without interruptions. If it does not start or remains problematic, revisit the previous steps to ensure everything was reassembled correctly.
Step 9: Run the Generator

Once started, allow the generator to run for a short amount of time to ensure it maintains a steady operation. During this period, monitor the generator for any signs of irregularity like sputtering or fluctuation in power output. This is also an excellent time to check for fuel leaks around the carburetor.
If all goes well, you can trust that the cleaning has improved the carburetor’s performance. As a final step, let the generator run for a few more minutes before powering it down and disconnecting any power sources. This will allow the carburetor to warm up and ensure all components function correctly.
Step 10: Perform Regular Maintenance
Establish a routine maintenance schedule to keep your generator in optimal condition. Regularly inspect and clean the carburetor, mainly if the generator is used frequently or stored for extended periods.
Keeping the carburetor clean will help prevent performance issues, ensuring your generator is always ready for use when needed. Remember always to follow the manufacturer’s guidelines and safety precautions when working on your generator.
By following these steps, you can effectively clean and maintain your generator’s carburetor, prolonging its lifespan and ensuring reliable performance.
5 Things You Should Avoid

- Skipping Safety Gear: Always wear appropriate safety equipment, such as gloves and goggles, when handling chemicals or mechanical parts. Neglecting to use safety gear can lead to injuries or accidents.
- Using Improper Cleaning Agents: Avoid using household cleaners or solvents that are not explicitly designed for carburetors. These can damage sensitive components or leave harmful residues that affect performance.
- Rushing the Disassembly Process: Take your time when disassembling the carburetor. Forcing parts apart can break components, make reassembly more difficult, and potentially cause lasting damage.
- Neglecting to Disconnect the Power Source: Always ensure that the generator is turned off and the power source is disconnected before starting any maintenance. You must do so to avoid electrical hazards.
- Ignoring Manufacturer Instructions: Avoid deviating from the manufacturer’s guidelines for cleaning and maintenance. Each generator model may have specific requirements that, if overlooked, could lead to inefficient operation or voided warranties.
By avoiding these common mistakes, you can effectively clean and maintain your generator’s carburetor, ensuring reliability and optimal performance.
Conclusion
How to clean the carburetor on a generator is an essential maintenance task that ensures optimal performance and reliability.
By following the outlined steps—disassembling the carburetor, inspecting and cleaning its components, and adequately reassembling and reinstalling it—you can significantly improve the efficiency of your generator. Regular maintenance not only prevents performance issues but also extends the machine’s life. Remember to adhere to safety guidelines throughout the process and consult the manufacturer’s instructions for any model-specific requirements.
Hopefully, this guide has provided you with the necessary knowledge and steps to effectively clean your generator’s carburetor, allowing you to enjoy uninterrupted power whenever needed. So, make sure to follow these steps regularly and keep your generator in top-notch condition. Happy cleaning!
Occupation: Expert in Hardware Tools
Education: Bachelor’s Degree in Mechanical Engineering
Profile:
Enrique Howard is a seasoned expert in the field of hardware tools, with a robust background in mechanical engineering that underpins his extensive knowledge and skills. Holding a degree in mechanical engineering, Enrique has cultivated a deep understanding of tool design, mechanics, and the intricacies of various hardware applications. His educational foundation empowers him to innovate and refine tools that enhance efficiency and effectiveness in a wide range of industries.
Professional Focus:
Enrique’s professional focus encompasses a diverse array of areas within the hardware tools sector, including:
- Tool Design and Development: Leveraging his engineering expertise, Enrique specializes in designing tools that meet specific user needs, ensuring optimal performance and durability.
- Material Science: Understanding the properties of various materials allows him to recommend the best tools for specific applications, enhancing safety and efficiency.
- Ergonomics: He emphasizes the importance of ergonomic design in tools, striving to create solutions that reduce user fatigue and improve comfort during prolonged use.
- Sustainability: Enrique is committed to promoting environmentally friendly practices in tool manufacturing, advocating for the use of sustainable materials and processes.
- Education and Training: Through workshops, seminars, and written content, he focuses on educating both professionals and DIY enthusiasts about tool selection, maintenance, and safe usage practices.
Throughout his career, Enrique has worked on numerous projects, collaborating with manufacturers and craftsmen to develop cutting-edge hardware solutions. His expertise spans from traditional hand tools to advanced power tools, allowing him to contribute significantly to both professional and DIY communities.
As an author, Enrique shares his insights through articles, guides, and tutorials, aimed at helping enthusiasts and professionals alike navigate the complexities of hardware tools. His passion for education and practical application drives him to continually explore new technologies and methodologies, making him a trusted voice in the hardware industry.
Whether he’s writing about the latest tool advancements or providing practical tips for tool maintenance, Enrique Howard is dedicated to empowering others with the knowledge and skills necessary to excel in their hardware endeavors.