
Are you having trouble with your vehicle’s electrical system? A faulty wiring harness is one common culprit.
When diagnosing electrical issues in vehicles or machinery, a wiring harness often becomes the focal point of investigation. The wiring harness assembles electrical cables or wires that transmit signals or electrical power throughout the vehicle. To ensure its functionality and integrity, a multimeter is essential for identifying any breaks, shorts, or faulty connections. This vital tool measures various electrical properties such as voltage, current, and resistance, providing accurate data to assess the condition of the wiring system.
This guide will offer a step-by-step approach on how to check wiring harness with multimeter ensure a reliable electrical system.
What Will You Need?
To perform a wiring harness check, you will need the following items:
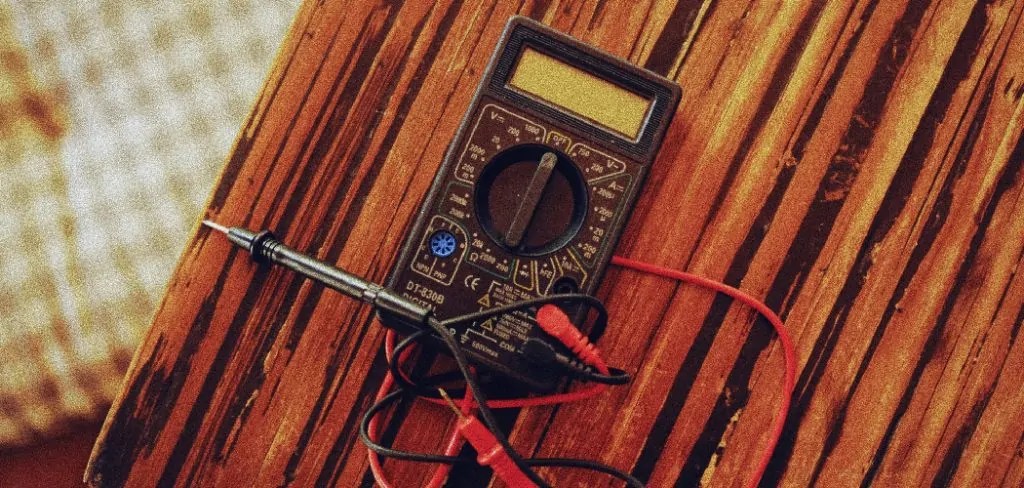
- A multimeter
- Safety gloves and glasses
- Wiring diagram (if available)
- Pen and paper for taking notes
Once you have gathered all the necessary items, you can proceed to the next steps.
10 Easy Steps on How to Check Wiring Harness With Multimeter
Step 1. Turn Off the Vehicle:
Before beginning any electrical diagnostics, ensure the vehicle is completely turned off. Turning off the ignition eliminates any risk of electric shock or unwanted short circuits while you work on the vehicle’s wiring system. Removing the key from the ignition and disconnecting the battery is also advisable. This precaution prevents any accidental cranking or powering of electrical circuits, further ensuring your safety during the inspection. Double-check that all electronic devices and systems in the vehicle are also turned off to avoid interference during testing. Once the car is safely powered down and disconnected, you can proceed confidently to the next step.
Step 2. Set the Multimeter to the Correct Setting:

After ensuring that the vehicle is safely powered down, it’s time to prepare your multimeter for testing. Set your multimeter to the appropriate setting based on what you are measuring—a typical setting for checking a wiring harness is resistance (measured in ohms). This setting helps identify any breaks or faulty connections within the wires. Ensure that your multimeter probes are also correctly connected; typically, the red probe should be in the volt/ohm socket, while the black probe should be in the standard socket. This setup allows you to accurately measure and identify the integrity of each wire in the harness.
Step 3. Consult the Wiring Diagram:
Once your multimeter is ready, consult the wiring diagram specific to your vehicle or machinery. This diagram is crucial as it provides a roadmap of the electrical system, detailing the paths and connections each wire should follow. By comparing the actual setup to the diagram, you can identify discrepancies or areas that require closer inspection. Pay attention to the color codes and pin configurations, which will guide you in determining which wires to test. Having a clear understanding of the layout will streamline your diagnostic process and increase the accuracy of your findings, helping to pinpoint any issues efficiently.
Step 4. Test for Continuity:

With the wiring diagram as your guide, begin testing for continuity in the harness. Continuity testing checks if there is a complete path for the current flow, ensuring no breaks in the wire. To do this, connect one probe of the multimeter to one end of the wire you want to test and the other probe to the opposite end.
If the multimeter emits a beep or displays a low resistance reading, it indicates that the wire has continuity and is in good condition. The wire may have a break or an open circuit if there is no beep or the resistance reading is very high. Carefully check any suspect areas for damage or disconnections. Continuity testing is crucial for identifying which wires in the harness may be causing electrical issues.
Step 5. Inspect for Shorts
After confirming continuity in the wiring harness, the next step is to check for any short circuits. A short occurs when the current bypasses the designated path, often leading to electrical malfunctions. To test for shorts, set your multimeter to measure resistance. Touch one probe to the wire and the other to a metal ground such as the vehicle chassis. A zero or very low resistance reading indicates a potential short. Inspect the wiring for any areas where the insulation may be compromised, or wires are exposed and touching metal surfaces. Address any identified shorts by repairing the affected wires, ensuring they have proper insulation to prevent further issues.
Step 6. Test for Voltage
Following the confirmation of continuity and absence of shorts, the next critical step is testing for voltage. Voltage testing helps verify whether the wires carry the correct amount of electrical power to their respective components. First, reconnect the vehicle’s battery for this part of the test, ensuring the ignition remains off to prevent any accidental startup. Set your multimeter to the voltage setting, choosing the appropriate range that matches your vehicle’s system (usually 12 volts for most vehicles). Connect the red probe to the wire or the terminal you wish to test and the black probe to a solid ground point on the car, such as the chassis or negative battery terminal.
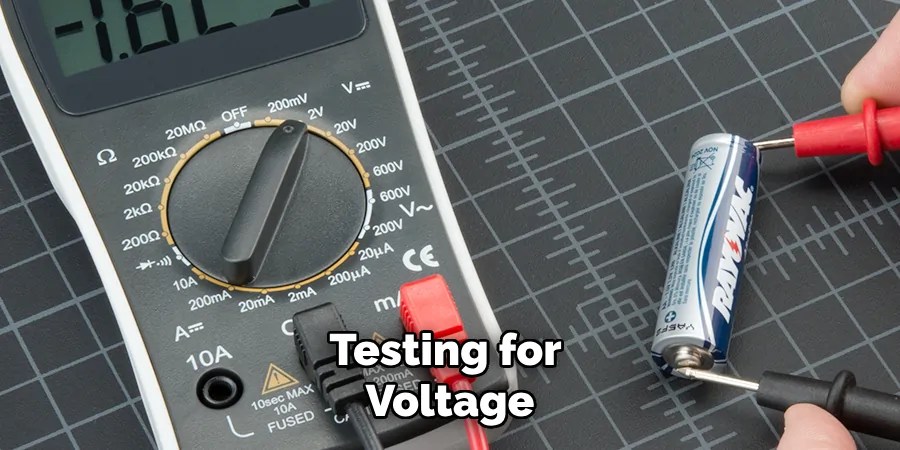
Carefully check the readings on your multimeter display. A stable and expected voltage reading suggests that the circuit is functioning as intended. On the other hand, a reading that is significantly lower or inconsistent may indicate issues such as loose connections, a potential break in the wire, or a faulty component drawing more power than necessary.
Step 7. Inspect Connectors and Terminals
After verifying voltage levels, it’s essential to inspect the connectors and terminals within the wiring harness. Over time, connectors can become corroded, loose, or damaged, leading to poor electrical connections. Begin by visually examining each connector, looking for signs of oxidation, rust, or physical wear and tear. Disconnect each connector, if possible, and inspect the terminal pins for any dirt or debris that may impede a solid connection. Clean any tarnished pins with an electrical contact cleaner and a fine brush to restore their conductive capabilities. Ensure all connections are snug and secure, as loose connectors can lead to intermittent connectivity issues. This step is crucial for maintaining a robust electrical system and preventing potential faults.
Step 8. Final Verification and Reassembly
With all individual components and connections meticulously inspected and tested, the final step is to perform a comprehensive verification of the system. Start by reassembling any parts that were disassembled during the testing process and ensure that all connectors and terminals are secured in their correct positions. Once everything is in place, reconnect the vehicle’s battery and power to test the overall functionality of the electrical system.
Carefully observe the performance of the electrical components, noting any signs of irregularity or malfunction. This includes checking for dashboard warnings, ensuring that lights operate correctly and that accessories powered by the wiring harness respond as expected.
Step 9. Record and Document Findings
Having completed the inspection and reassembly of the wiring harness, it is essential to record and document your findings. Start by taking detailed notes of any issues you discovered, such as broken wires, shorts, or faulty connectors, along with the corrective actions taken to address these issues.
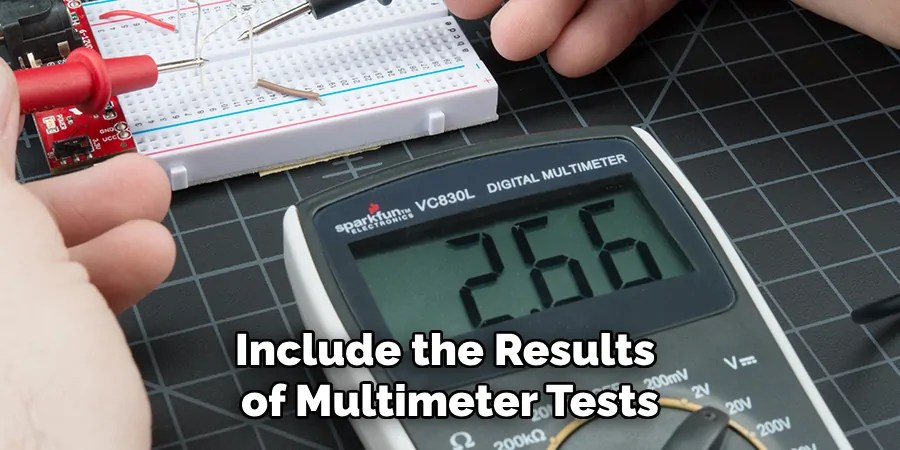
Include the results of multimeter tests, specifying the readings obtained for continuity, resistance, and voltage levels. Creating a comprehensive report not only assists in future troubleshooting but also provides valuable information for anyone else who may work on the electrical system. Filed properly, this documentation becomes an asset for tracking the condition and maintenance history of the vehicle’s wiring system, ensuring that any recurring or new issues can be dealt with more efficiently.
Step 10. Perform a Test Drive
Once the electrical system has been thoroughly tested and all issues addressed, it’s time to perform a test drive to ensure the vehicle operates smoothly. Begin by turning on the vehicle and allowing it to idle for a few minutes, observing any immediate warning lights or anomalies. Then, take the car for a brief drive, paying close attention to the operation of all electrical components, such as headlights, indicators, and in-car electronics. Monitor the dashboard for any error messages and listen for unusual sounds that might indicate underlying electrical problems. A seamless test drive without any abnormalities confirms that the repairs and checks have been successful and the electrical system is functioning correctly.
By following these ten steps, you can effectively troubleshoot and maintain your vehicle’s wiring harness, ensuring that it continues to operate reliably for years.
Conclusion
In conclusion, how to check wiring harness with multimeter is a systematic process that ensures your vehicle’s electrical system functions effectively and safely.
By following a step-by-step approach, from identifying and rectifying shorts and verifying voltage levels to meticulously inspecting connectors and terminals, you can diagnose potential issues before they lead to significant problems. Proper documentation of your findings is a valuable resource for ongoing maintenance and troubleshooting efforts. Through careful attention to detail and thorough testing, any detected faults can be addressed, ensuring the longevity and reliability of the vehicle’s electrical components.
Regular maintenance and checks with a multimeter not only prevent unexpected failures but also contribute to a stable and efficient vehicular operation.
Occupation: Expert in Hardware Tools
Education: Bachelor’s Degree in Mechanical Engineering
Profile:
Enrique Howard is a seasoned expert in the field of hardware tools, with a robust background in mechanical engineering that underpins his extensive knowledge and skills. Holding a degree in mechanical engineering, Enrique has cultivated a deep understanding of tool design, mechanics, and the intricacies of various hardware applications. His educational foundation empowers him to innovate and refine tools that enhance efficiency and effectiveness in a wide range of industries.
Professional Focus:
Enrique’s professional focus encompasses a diverse array of areas within the hardware tools sector, including:
- Tool Design and Development: Leveraging his engineering expertise, Enrique specializes in designing tools that meet specific user needs, ensuring optimal performance and durability.
- Material Science: Understanding the properties of various materials allows him to recommend the best tools for specific applications, enhancing safety and efficiency.
- Ergonomics: He emphasizes the importance of ergonomic design in tools, striving to create solutions that reduce user fatigue and improve comfort during prolonged use.
- Sustainability: Enrique is committed to promoting environmentally friendly practices in tool manufacturing, advocating for the use of sustainable materials and processes.
- Education and Training: Through workshops, seminars, and written content, he focuses on educating both professionals and DIY enthusiasts about tool selection, maintenance, and safe usage practices.
Throughout his career, Enrique has worked on numerous projects, collaborating with manufacturers and craftsmen to develop cutting-edge hardware solutions. His expertise spans from traditional hand tools to advanced power tools, allowing him to contribute significantly to both professional and DIY communities.
As an author, Enrique shares his insights through articles, guides, and tutorials, aimed at helping enthusiasts and professionals alike navigate the complexities of hardware tools. His passion for education and practical application drives him to continually explore new technologies and methodologies, making him a trusted voice in the hardware industry.
Whether he’s writing about the latest tool advancements or providing practical tips for tool maintenance, Enrique Howard is dedicated to empowering others with the knowledge and skills necessary to excel in their hardware endeavors.